We make a beautiful and strong country table with your own hands

Even if the production of furniture is far from your sphere, it is quite possible to make a country table with your own hands to gather with your family and friends on warm summer evenings.

Its main advantage, unlike the purchase, is undoubted savings. It is not necessary to make the table from scratch: simply by mounting the purchased parts, you will save 30-50% of the cost. If you manage to use materials left over from construction or repair, the costs will be limited to acquiring fittings.

Resistant suburban table

To choose a design, it is necessary to decide where the product will be used.

Using cheap off-board boards for a country house or kitchen table is not a standard, you will get benefits that are inaccessible for mass production. Sounds doubtful? But this is so: knots, because of which the boards are rejected, have interesting decorative properties. If you succeed in emphasizing them successfully - you will become the author of a completely unique design product, which is a pity to be left in the garden in the rain.

Table for giving own hands

Making a country table with your own hands to gather with family and friends on warm summer evenings is quite possible.

We determine the design and construction

To choose a design, it is necessary to decide where the product will be used: on a grassy lawn under a tree, to complement a gazebo, to stand in a workshop or in a house.

The simplest country table can be mounted in a few hours with a minimum of materials, but it will not last long. To get a product that will be really nice to use, you need to carefully prepare the boards and qualitatively carry out all the technical operations at each of the stages.

Wooden street table for giving

Its main advantage, unlike the purchase, is undoubted savings.

If you find a large tree stump in the forest, it may turn out to be an easy-to-make garden table. It is only necessary to remove the bark from the stump, make a smooth cut along the top, polish it, treat it with an antiseptic and varnish it. It is enough to nail or fasten a ready-made furniture shield to the “leg” of the stump - and that's it.


Worktops made of planks, fastened at the bottom with transverse rails, look good. If you like the glued tabletop more, you can do it yourself, but it will take a lot of effort.

Table with simple straight legs

If you succeed in emphasizing them successfully - you will become the author of a completely unique design product, which is a pity to be left in the garden in the rain.

It is difficult for a novice master to secure the legs securely, so try to choose a design, properly assessing your skills and taking into account the cost of labor and time. The easiest to make cross-shaped and L-shaped legs. To attach straight legs - you need to carefully complete the connection details.


One of the coziest garden options is a collapsible table with benches that can be installed in the gazebo or on the veranda. It is easy to do it, the main thing is to choose high-quality materials and properly prepare them for work.

Table with benches for giving

The simplest country table can be mounted in a few hours with a minimum of materials, but it will not last long.

How to choose a tree?

Many types of wood are suitable for a garden or kitchen table, both soft (pine, spruce, cedar, fir) and hard wood (oak, birch, ash, walnut, maple, apple, pear, acacia, etc.) The exception is too soft wood (poplar, alder, aspen, willow).


One of the main parameters of the suitability of wood for the manufacture of furniture is resistance to decay: the above breeds meet this requirement.

If you do not plan to engage in furniture work all the time or just start to practice, give preference to the most common wood species - pine and birch.

A table for giving their own hands-design

Worktops made of planks, fastened at the bottom with transverse rails, look good.

For tabletops, frames and legs it is possible to use wood of different species. At the assembly stage, dowels will be needed: they are usually made from acacia or boxwood. Birch wood has an inexpressive pattern and can significantly warp due to spilled liquid - it is better not to use it as a tabletop material, but thanks to the hardness of this breed, you can make legs out of it.


Tabletop is better to perform oak or pine. If you know how to brush wood, the surface of the kitchen table can become a real work of art. Wood of soft species lends itself to brushing: wood is burned with a gas burner, and soft fibers are removed with an iron brush. Work is best done in the yard because of the large amount of dust. If you managed to burn wood evenly, the result will please you. Brush can be tinted with stains, stains, diluted with water artistic acrylic paint. Of course, the brushing of wood is not necessary: ​​it is only a finishing option.

set of garden furniture

If you like the glued tabletop more, you can do it yourself, but it will take a lot of effort.

The choice of paints and adhesives

Before proceeding with the installation, the boards must be protected from rotting. Wood should be impregnated with water-polymer emulsion (VPE): the treatment is carried out twice with an interval of 3-5 days. This is enough to make the product last a long time.

Some models require glue. Along with special woodworking adhesives (BF-2, etc.), you can use construction PVA: it is applied to both glued surfaces, dried to “tack-free”, then connect the parts and hold under pressure for up to three days.

Tables and benches for giving

It is difficult for a novice master to secure the legs securely, so try to choose a design, properly assessing your skills and taking into account the cost of labor and time.

The choice of paints and varnishes is determined by where it is planned to use the product: in the yard or indoors. For the garden table, which is inevitably exposed to precipitation, suitable alkyd, alkyd-urethane, nitrocellulose varnishes and oil paints. For the kitchen table, as well as for any furniture that is constantly located in the room, it is better to use acrylic paints and varnishes: they are more environmentally friendly and do not have a strong smell. Lucky, marked with "blue angel" are recommended for children's furniture and toys.


If you decide to cover the wood with stain, paint or simply with tinted varnish, this must be done before assembly. It is necessary to consider the compatibility of materials. The lacquer is tinted with a suitable paint composition: if the lacquer is alkyd, the paint should be oil-based, if you use acrylic lacquer, it can be tinted only with acrylic paint. First, a small amount of varnish is thoroughly mixed in a separate container with paint, and then the resulting mixture is added to a larger volume of varnish.

table for giving their own photo

One of the coziest garden options is a collapsible table with benches that can be installed in the gazebo or on the veranda.

What tools are needed

For work you will need:

  • hacksaw,
  • circular saw or jigsaw;
  • drill;
  • screwdriver;
  • hammer (if decided to use nails).
Dacha furniture DIY photo

Many types of wood are suitable for garden or kitchen tables.

This list includes only the most necessary tools, but to make the work more comfortable, and the finished product looks aesthetically pleasing, it is advisable to buy or rent a swivel bar, eccentric grinder and a milling machine.


The swivel bar allows you to cut at exactly the right angle. An eccentric grinder will allow you to prepare parts simply, quickly and efficiently: in an hour you will be polishing the boards, instead of doing it all day by hand with sandpaper. For high-quality machining of the ends, a belt grinder is useful, and a milling machine allows you to select the wood for the necessary grooves and process the edges.

country table

If you do not plan to engage in furniture work constantly or just start to practice.

Homemade pallets table

Spectacular table in rustic style can be constructed from pallets (wooden pallets). If you are a happy owner of such a container, especially a two-cloth pallet, simply disassemble it: there is no problem acquiring boards!

Do you think that buying new boards is always better? You probably did not work with wood before: raw wood cannot be used (the product is deformed in a few months), and dry boards cost much more. To dry the boards of raw wood, they are piled in a well-ventilated room: this necessary process will delay your project for 4-6 months! A good option for a kitchen table can be the already mentioned rejected boards, which are also dry.

the table for giving is made of the pallet entirely

For tabletops, frames and legs it is possible to use wood of different species.

Back to the pallets: they are disassembled. Now you have at your disposal strong boards with different patterns and colors, it is possible that from trees of different species. These features should not be considered as shortcomings: they will give the product a zest: you just need to create an interesting composition from them, alternating boards of a similar shade.

From the side parts of the pallet you get an excellent frame, and the remaining strips will be used to assemble the table top.

furniture from a pallet for giving

Work is best done in the yard because of the large amount of dust.

To make the legs, you need a bar with a thickness of at least 5 cm. All the details need to be prepared: sand the paper strictly with fibers, first with coarse sandpaper (No 120-150), then finer grain (No 400-600), carefully removing dust.

Some boards can be painted with acrylic or oil paint. Loft-style fans can use stencils in the form of numbers or simple graphic characters. Boards with a beautiful natural pattern “freeze” or simply varnish. After staining or the first layer of acrylic lacquer, the soft fibers rise; they need to sand the sandpaper of medium grain and apply a new layer of varnish.

garden furniture from pallets

Spectacular table in rustic style can be constructed from pallets (wooden pallets).

If a non-water based lacquer is used, it is enough to apply 2-3 layers, and if acrylic - the number of layers can be up to ten.


After painting the parts, you can proceed to the installation, which consists of several stages.

original ideas for using pallets

A good option for the kitchen table can be discarded boards, also dry.

The boards of the table top are fastened with the boards, which are placed at the joints of the boards. With the help of a drill, screwdriver and screws we fix the boards to the slats (at the joints we use two screws, on solid boards - one). The use of a drill is necessary so that the wood does not crack when screwing in the screws. We assemble the frame from the prepared sides of the pallets. With the help of a drill of a suitable diameter for self-tapping screws, we drill holes at the joints. We coat the joints with glue and fix them with screws. Install the legs: just fasten the boards to the frame, screwing the screws on the diagonal. To strengthen the design, in the same way we make the bottom of the jumper.

table for giving from pallets

To make the legs, you need a bar with a thickness of at least 5 cm.

Wooden table with glued top

For a glued table top you need to pick up boards of the same width. If the table is designed for the workshop and its appearance does not matter much, you can use the old floor boards: there are already grooves. To make the grooves yourself, you need a milling machine.


A level surface is required to collect the worktop. We simply coat the sides with glue, we join the boards without gaps and we tighten the resulting construction with clamps. Depending on the glue used, the tabletop should dry from 1 to 3 days. If done correctly, you will get a tabletop with a completely flat surface without gaps. It remains to work the ends - first trim a jigsaw, and then polished. In the absence of a belt sander, this must be done manually - with sandpaper, first of all with large, then medium grit.

Wood table top do it yourself

After painting the parts, you can proceed to the installation, which consists of several stages.

If you do not want to mess around with glue and clamps - you can use a ready-made furniture shield from the hardware store. Then the tabletop remains covered with clear or tinted varnish.


For a good result, you need to apply 5-7 (for acrylic varnish up to 10) layers. After every third layer, the working surface of the tabletop should be sandwiched with fine-grained emery paper, carefully removing the dust with a damp cloth. At the stage of varnishing it is important not to rush: each layer of varnish should dry well.

It remains to make the legs of the garden or kitchen table: dwell on the version with L-shaped legs. You will need boards with a minimum thickness of 22-25 mm.

wooden table photo

For a glued table top you need to pick up boards of the same width.

L-shaped legs consist of two parts, connected at an angle of 90. On the joined boards, you need to make a selection, lubricate the joint with joiner's glue, and then install the screws.


When the glue dries, we coat the legs with varnish and, after drying, simply fasten the screws to the tabletop.

Table legs ready

The connection of the legs to the table top has several options.

Straight leg table

To make straight legs, it is enough to cut a thick timber into pieces of the same length. The connection of such legs with the table top has several options.

In order to have straight legs installed securely, at home you can use the connection on dowels. They can be made independently of acacia wood or buy ready-made. For assembling dowel joints, quick-drying joinery glue (BF-2) is needed.

mobile table for giving

To make straight legs, it is enough to cut a thick timber into pieces of the same length.

Table with X-shaped legs

X-shaped legs are made of bars or boards with a minimum thickness of 50 mm.

The sequence of work.

  1. On the inner side of the table top we fasten two screws on each side to the screws.
  2. To the table looked good, the edges of the slats need to be pre-cut at an angle of 52.
  3. The paired straps are fastened so that the legs fit, we make 2-3 mm overlaps on each side.
  4. Put the boards on a flat surface, crossing them at the right angle. Measure the distance between the ends of the boards: it must match the width of the table.
  5. The place of intersection is circled with chalk: here it is necessary to choose half the thickness of the boards, so that after assembly they lie in the same plane.
  6. We coat the grooves with glue and place the parts under the press for 1-3 days. For greater reliability, the connection can be strengthened with self-tapping screws.
  7. We varnish legs.
  8. It remains to attach them to the tabletop, placing them in the grooves formed by the slats - and the table for the villa with your own hands is ready.
Table with X-shaped legs

X-shaped legs are made of bars or boards with a minimum thickness of 50 mm.

Table with benches

The optimal solution for the gazebo is a dining table with benches attached to it. It is better to make such construction collapsible to clean for the winter in the room.


The table will require thick boards (from 32 mm), which need to be cut into pieces according to the drawing. In this embodiment, two benches are attached to the table. When all parts are cut, they must be sanded, paying particular attention to the ends. Each board separately varnished.

Wooden garden table with benches

The optimal solution for the gazebo is a dining table with benches attached to it.

To connect the parts of the structure, we prepare the studs (length 160 mm), nuts and washers - 24 pcs. Each. For other compounds, use screws or nails of suitable length. With the help of a drill, it is necessary to prepare all the mounting holes.

According to the drawing we collect the table top and the upper parts of the benches. We cut the cross rails along the edges, the angle should be 45. This is convenient to do with the help of the rotary mash.

We make and fasten all the legs on the screws. Fasten parts cut at an angle.

table with benches for giving a photo

Each board separately varnished.

We tie the product with bolts. The holes for the studs must be pre-drilled. When installing the stud, you need to put the washers on both sides and tighten the nuts using the wrench.

table and benches do-it-yourself

We tie the product with bolts.

Seat boards fasten with gaps of 5 mm. When the seats are connected with sawn supports, we fasten them to the assembled base with boards of 160 cm: 4 boards will be needed.

Install the remaining studs and enjoy the result.

We make a beautiful and comfortable table for giving your own hands

With the help of a drill, it is necessary to prepare all the mounting holes.

VIDEO: Wooden table in the gazebo with their own hands

50 photo ideas: how to make this table with your own hands

We recommend related articles.
ready table How to make a comfortable table for breakfast in bed with your own hands
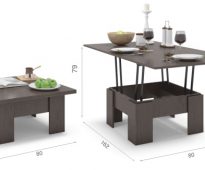
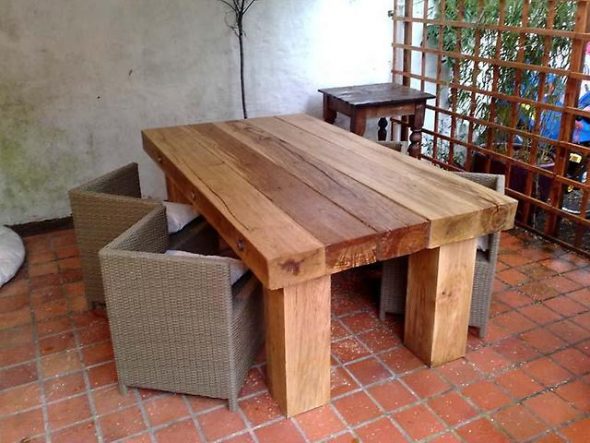
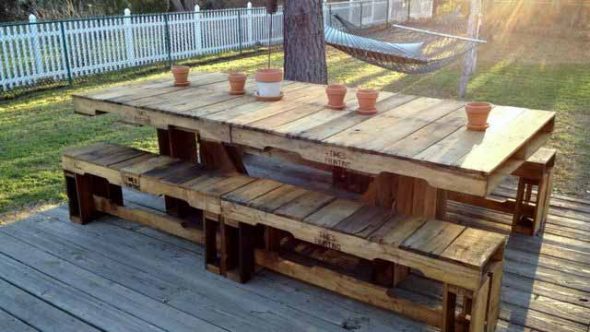
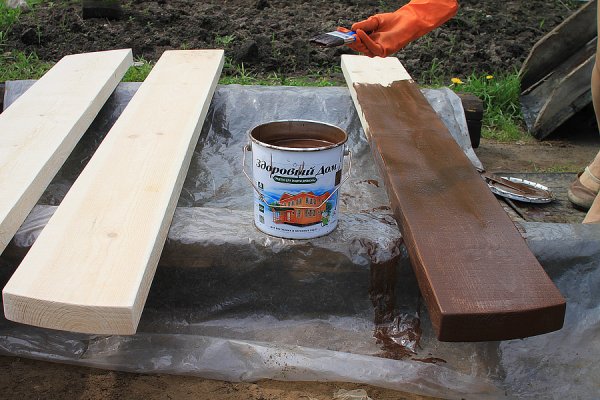
Breakfast in bed is a pleasant surprise for a loved one who cannot be realized without a bedside table. This item helps to make such surprises with enviable periodicity and competent ...
Orange folding table for working at a computer Folding table - comfortable, most practical design
This piece of furniture will allow to save free space in the house, apartment, organically "fit" into the interior, functional in use. The folding table consists of a table top on a lifting mechanism ....
super glue clerical What to wipe off super glue from the table
Gluing or gluing various parts is not an easy way. Basically, this happens on top of the table. If the glue has not yet stiffened, then it can be quickly removed by wiping with a dry cloth and wetting ...
transforming table for home Basic parameters for the selection of the table-transformer
The modern pace of life has thrown away a calm home. Many people live in small one-room or two-room housing, which is much more profitable and more practical. The kitchen is combined with a living ...
How to build a transforming table yourself?
For a small apartment, furniture such as a transforming table is indispensable. It is easy to turn it from a compact coffee table into a full-fledged dining table for several people. Read ...
Baby table and chair We make a comfortable party for the child with their own hands
The first tool for the prevention of scoliosis among children is a properly chosen children's desk. She spends a lot of time at school, at home. In educational institutions, the quality of children's workplaces is monitored by ...
Add a comment
By clicking a button you agree to privacy policy and site rules set forth in user agreement

Sofas

Furniture

Armchairs