We make a comfortable wardrobe with your own hands

Regardless of the size of the apartment, a place for compact storage of a huge number of things - clothes, shoes, linen, books, and many other necessary (and not very) - is always necessary. And such a place is a wardrobe.

The ideal option is a coupe - saving space in the absence of swinging doors, spaciousness, and the design can be a decoration of any room. Mirrors will visually increase the space, inserts made of MDF will make the interior unique, and soft triplex with a pattern of your choice will generally turn your furniture into a work of art.

Sliding wardrobe for a hall

Sliding wardrobe with the hands for a hall

Which closet to choose? The answer is simple. If you settled in your home seriously and for a long time, if you do not like permutations, if there is a free niche that you definitely want to use, then you need a built-in one. But if the move is still possible and you, due to the nature of your character, it is difficult to part with your favorite and convenient things, then your choice is the usual corpus made for your individual project.

Furniture, in the design and design of which everything is thought out by you and for you, is more than a piece of furniture: it is your creation, your pride, a way to express your individuality.

You can, of course, just go to the store and buy an option that suits you more or less in terms of color, filling, size and price. One of tens of thousands produced on conveyors of furniture factories. You can order production on an individual project in one of the many salons. And you can do it yourself, putting a piece of your soul in the thing that will be in front of your eyes every day. In one piece of interior to realize yourself as a designer, designer, sawing, collector. And let someone of your friends not like your creation. This is your work and no one has the right to criticize it.

Step. 1. Decide on the type - built-in or box.

Built

Built-in wardrobe

Built-in corner wardrobe

Virtues

  • Mounted in niches and closets, saves space. Here you can compactly store a variety of things - from jars of jam and tools to things of daily use.
  • Thanks to the design of sliding doors, the niche disappears, the angularity of the room disappears and a unique interior detail appears in its place.
  • Between him and the wall there is no empty space - a place where dust constantly collects.
  • Make a built-in closet easier - fewer details, as the shelves are attached to the walls.
  • Sockets and switches are easily placed inside.

disadvantages

  • The built-in is absolutely non-transportable, and even if you decide to disassemble and transport it to another room, it will take a lot of time, effort and nerves to rework for new dimensions.
  • It has no back wall, and you will need to prepare a niche before installation.

It is possible to make a built-in wardrobe, and without having a niche with two main walls. "Built-in" it may be partially. In its design may be present sidewall or roof.

Corpus

Cabinet

Double-wing cabinet wardrobe

Virtues

  • It can be installed in any convenient place of the room or hallway.
  • It can be used as a partition in a room for zoning a room.
  • Additional wall preparation is not required. On the contrary, the cabinet can cover the flaws of the wall.

disadvantages

  • “Unnecessary”, unused spaces: between the ceiling and the roof, between the side wall and the wall.

Step 2. The choice of design and content.

Internal content

Internal filling of the large wardrobe

Acquisition of the wardrobe became a necessity? Then spend a few days trying to figure out WHAT exactly you want. Look through the catalogs, go through the furniture stores, read articles on the Internet. Mark for yourself interesting solutions and details, and those nuances in design and design that I would like to avoid.

Step. 3. The choice of material.

Main material

  • The most common is laminated chipboard. This is a very practical material. It is easy to process and affordable. A variety of colors gives ample opportunities for design decisions. LDSP is manufactured industrially. Sheets have different sizes and thickness. For the production of used plates with a thickness of 16 mm, and for inserts in the door - a thickness of 10 mm.
  • Fiberboard (MDF) 3.2 mm thick suitable for the rear wall;
  • MDF is a beautiful, durable, more environmentally friendly, used for the manufacture of furniture in rooms with high humidity, but much more expensive material;
  • Wood is the most environmentally friendly material, but, unfortunately, it is poorly suited for the manufacture of wardrobes.
  • Drywall because of its fragility for the manufacture of furniture is generally not recommended.

The system of sliding doors. Currently, the market is quite a large selection of different systems:

  • aluminum;
  • steel;
  • suspended;
  • frameless, etc.

Each of them has its advantages and disadvantages. For example, in aluminum systems, convenient vertical profiles-handles - ideal for the hallway and nursery. Steel systems are distinguished by elegance, which is especially important in the bedroom. Suspended systems fit perfectly into the interior, where they should be invisible.

Step 4. Decide on the size.

Built

  • Width. Measure the width of the niche along the rear wall along three horizons: near the ceiling, in the middle of the wall and near the floor. A large value is taken as calculated.
  • Height. Measure along the wall to the right and left. For the calculated distance between the shelves, take the smaller one.
  • Depth. It depends on what will be stored here. Will there be a horizontal bar for hangers or only shelves.

Corpus

Approximate scheme

Approximate diagram of the cabinet compartment with dimensions

  • Width. Measure by location. It is necessary to consider: the curvature of the walls (if you plan to place the cabinet from wall to jamb, then due to the inclination of the wall, even a centimeter of the finished product may not fit in the space you have planned), the presence of switches and sockets.
  • Height. Firstly, even the tallest cabinet should be 15-20 cm below the ceiling height, while the need for upper inaccessible shelves should be much more important to you than being able to wipe the dust off its cover without using a stepladder and, secondly, not worth it ignore the recommendations of the manufacturers of wardrobe systems at the maximum allowable height.
  • Depth. This parameter entirely depends on what you will store in it. If we are talking only about shelves, then we have: shelf depth + space for rail and doors (as indicated in the system manufacturer’s instructions). If we mean a bar for hangers, then it is at least 50 cm, since the hanger for clothes has a length of 45-48 cm.If this is a vertical holder for hangers with attachment to the shelf, then decide first with it.

Step 5. Calculate the number of compartment doors

The width recommended by manufacturers is from 60 to 90 cm. If the width is less than 50 cm, it will lose its stability, and more than a meter - ease of movement (there is a maximum permissible load on the rollers, at which the manufacturer gives a guarantee for their long use).

The rails (upper and lower rail), depending on the manufacturer, are 4-5.5 m long. If your cabinet is longer than 3 meters, think about how you will transport the five-meter rail. There is a simple solution - to install a partition from chipboard. Get two independent niches. Visually the partition will be unnoticed. It is not recommended to join the guides, it will quickly disable the wheels.

Step 6. Decide on the door height

For built-in cabinets

If the height of the niche is in the range of up to 280 cm, then the doors can be made in full height. If this size is larger, then we can consider two options.

  1. Mount the upper mezzanine with hinged doors.
  2. Make a roof at a height of 280 cm (but given the fact that the dust there must be at least sometimes wiped).

The roof variant is also relevant in the presence of stretch ceilings, if a bar was not bolted to the ceiling in the right place, especially for the installation of built-in furniture.

For case products, the maximum height = height to the ceiling minus 15-20 cm.

Step 7. Sketch

Sketch of the wardrobe

Preliminary sketch of the wardrobe in the manual version

Before proceeding directly to the drawing, sketch out the desired arrangement of things. Measure them if necessary. For example, the dimensions of the ironing board or existing baskets and shelves for shoes.

Make a sketch (as you can). On the sketch designate those dimensions that must be strictly adhered to. Now, mentally place the doors and move them to the right and left in various ways, thus checking accessibility to all parts of the internal filling.

Step 8. Drawing (Measure seven times - cut one).

Cabinet sketch

Drawing wardrobe with dimensions

Built-in wardrobe

The most convenient way is to make a preliminary marking directly on the niche walls with a pencil. This will make it possible to avoid errors in the size of parts.

For example:

  1. top shelf = niche width x internal filling depth (i.e. cabinet depth minus doors);
  2. stand = niche height - height of the upper shelf - material thickness;
  3. shelves on the right = (niche width / 2 - 5-10 cm) x depth;
  4. shelves on the left = (niche width - shelves on the right - material thickness) x depth.

Additionally, you may need

Side racks: bar 3 = niche height x 7 cm, bar 4 = niche height x 10 cm
Base: bar 1 = (niche width) x 7 cm - 2 parts, bar 2 = (niche width - one or two side racks) x 10 cm - 1 detail

Additional details are needed if it is not possible to level the side walls and the floor. The rectangle into which the compartment doors will be mounted should be perfect. This can be achieved by mounting the box for them in whole or in part. With uneven walls, gaps between the walls will be visible, and if the floor or ceiling is uneven, the door can jam or pop out of the slots altogether, not to mention spontaneous opening and closing - it will slide down the slope under its own weight.

Cabinet wardrobe

Decide on:

  • how you will fix the back wall of fiberboard, if it is located in a niche, from wall to wall, and if there is no answer, then you should consider the option with a built-in closet, where the back wall is missing;
  • whether your cabinet will lean on the legs or on the sides;
  • what system of compartment doors you will use.

Carefully read the instructions for this type of door, paying particular attention to the maximum and minimum permissible dimensions. The durability of work and reliability of the system itself depends on it.

Directly drawing.Armed with a T-square, pencil and eraser, proceed to the most crucial part of the work.

Consider the option with a support on the sidewalls.

Details from the main material:

  1. roof = cabinet length x depth;
  2. support = (cabinet depth - thickness of the material for the basement - 20 mm - the width of the plinth) x height of the basement;
  3. back wall (DVP) = (cabinet height - base - 2-4 mm) х (cabinet length - 2-4 mm);
  4. sidewalls = (cabinet height - material thickness) x depth;
  5. bottom = (roof width - two material thicknesses) x depth;
  6. base = cabinet length - two material thicknesses) x 70-100 mm;
  7. rack = (cabinet height - basement - 2 material thicknesses) х (cabinet depth - doors);
  8. shelves = (cabinet width - 3 material thicknesses - width of the next niche) x (cabinet depth - doors).

Here you should pay attention to the fact that the doors of the wardrobe are wider than 1/2 of the internal width, there is an overlap of the doors, and if you have baskets or drawers planned, then they simply will not move out of the cabinet, that is, the size of the niche with shelves baskets should be less than half.

Attention! Do not leave the roof without support on the rack, it may sag.

Step. 9. Detailing

Detail table

Table of parts for the manufacture of the cabinet

According to the finished drawing, make a list of parts with their dimensions (specification).

Mark the parts, the ends of which you want to close the decorative edge and, taking into account the thickness of the edge, adjust the dimensions of the parts.

Mark the parts on which you want to make a "cut", for example, under the plinth on the sides.

Step 10. Pre Cutting

Chipboard sheets cutting

Approximate cutting of chipboard sheets

On a sheet of paper, to scale, compactly arrange all the details. If, as a result, you need 1 sheet of material and a little bit more, then you can adjust the basic design by replacing some shelves, for example, with grid shelves.

Now that you know exactly the inside size, it is necessary, in strict accordance with the manufacturer’s recommendations for sliding wardrobes, to make door details.

Step 11. Tools and materials

Tools that you need for installation:

  • roulette;
  • hacksaw for wood;
  • gon;
  • building level;
  • drill and confirmation drill;
  • corner clamps;
  • screwdriver with a set of bits (cross and hex);
  • mallet;
  • conductor for perpendicular drilling.

Materials:

  • the main material provided by the project (chipboard, fiberboard, MDF);
  • edge (of your choice) and PVA glue;
  • Euro screws 70x5;
  • caps;
  • screws (for fixing the back wall and accessories);
  • furniture corners (plastic or metal) for attaching cabinet parts to mills;
  • furniture accessories (bars, holders, shelf-grids, sliding baskets);
  • chalk or wax for painting chips;
  • components for doors (guides, profiles, rollers, strips, bolts, latches - all that is required for the assembly of this design).

Attention! Carefully read the assembly instructions for the doors of your choice. Do not back down from them!

Step 12. Step by step instructions.

Built-in closet

Previously in a niche you need:

  • to clear from old finishing materials;
  • level the surface;
  • paint or paste over.

Instruction

  1. Cut parts of the required size, seal visible parts with the edge.

    Details of the wardrobe

    Details for the future wardrobe

  2. Using furniture plastic corners (or metal, if you think this is more reliable) attach the main vertical posts and transverse shelves to the floor, ceiling and walls in accordance with the preliminary marking and drawing. With each other, the details are connected with eurotangles.

    We assemble a wardrobe

    We assemble the wardrobe section by section and exhibit near the wall

  3. The correctness of the fastening of every detail is checked with the help of a building level.
  4. (if necessary) Mount the box or its elements in a niche. Between themselves, additional parts are fastened with euro-screws, attached to the wall with the help of corners.

    Putting the frame

    We mount sections in a niche and assemble a frame

  5. Attach all fittings (baskets, hangers) to the cabinet with self-tapping screws;

    Boxes collected

    We fasten all the outer shelves and racks to the walls, floor and ceiling; we assemble the boxes and put them in place.

  6. Install the top and bottom guides.

    Fasten guides

    Fasten the guides to the ceiling and to the floor

  7. Measure the resulting doorway.
  8. Disguise all visible chips with wax, fasten the plugs.
  9. In strict accordance with the manufacturer's instructions to assemble the door.

    Door assembly

    Wardrobe door assembly scheme

  10. Hang the doors.
    Door hanger

    Suspension of doors with lower support rail

    Appearance of a sliding wardrobe

    The appearance of a new functional wardrobe, assembled by their hands

Cabinet wardrobe.

  1. Cut parts of the required size, seal visible parts with the edge.

    Edge application

    Edging on the details of the cabinet

  2. To make a marking for a fastening of details among themselves.

    Marking is applied to the bottom surface

    The marking of the fastening points is applied to the bottom surface, holes are drilled under the fasteners, after which the base of two strips and the central partition are mounted

  3. Drill holes: on flat surfaces - through, at the ends - no more than 60 mm deep, 5 mm in diameter.
  4. Assemble the door in strict accordance with the manufacturer's instructions.
  5. Assemble the body and its contents.
    Next, fasten the upper shelves

    Next, fasten the upper shelves and install the stiffener from chipboard to the back wall of the cabinet to fix the whole structure in the correct position

    For fixing open side shelves

    Confirmats are used to fasten open side shelves with rounded corners; shelves are attached to the surfaces of the side and rear walls with 2 fasteners for each

  6. Align the cabinet by measuring and comparing its diagonal with the help of a tape measure.

    Door installation

    Installation of sliding door closet

  7. Stepping back from the edge of the lid and bottom 1 cm, fasten the guides.

    Door leaf guides

    Guides for the door leaf are fastened with screws with press washers

  8. Hang the doors.
    Rollers are inserted into the upper guide.

    To install the door leaf, rollers are inserted into the upper rail, the lower rollers are pressed in and the blade enters the profile, resting on the lower rail

    Ready cabinet

    Ready-made cabinet wardrobe assembled by hand

Video: How to assemble a wardrobe with their own hands. Video installation instructions.

Photo ideas for the use of built-in and cabinet wardrobes in different rooms:

We recommend related articles.
Large heavy doors 
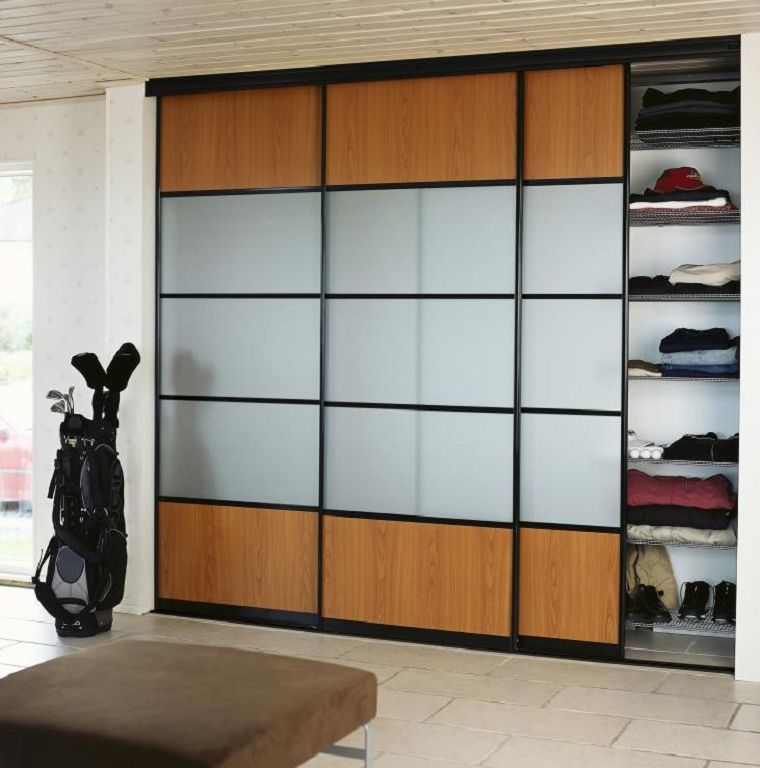
How to make the calculation of the door wardrobe
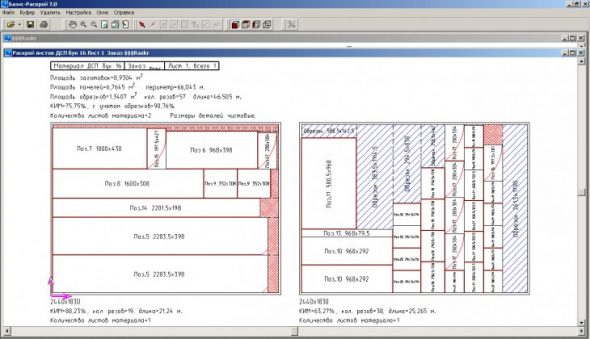
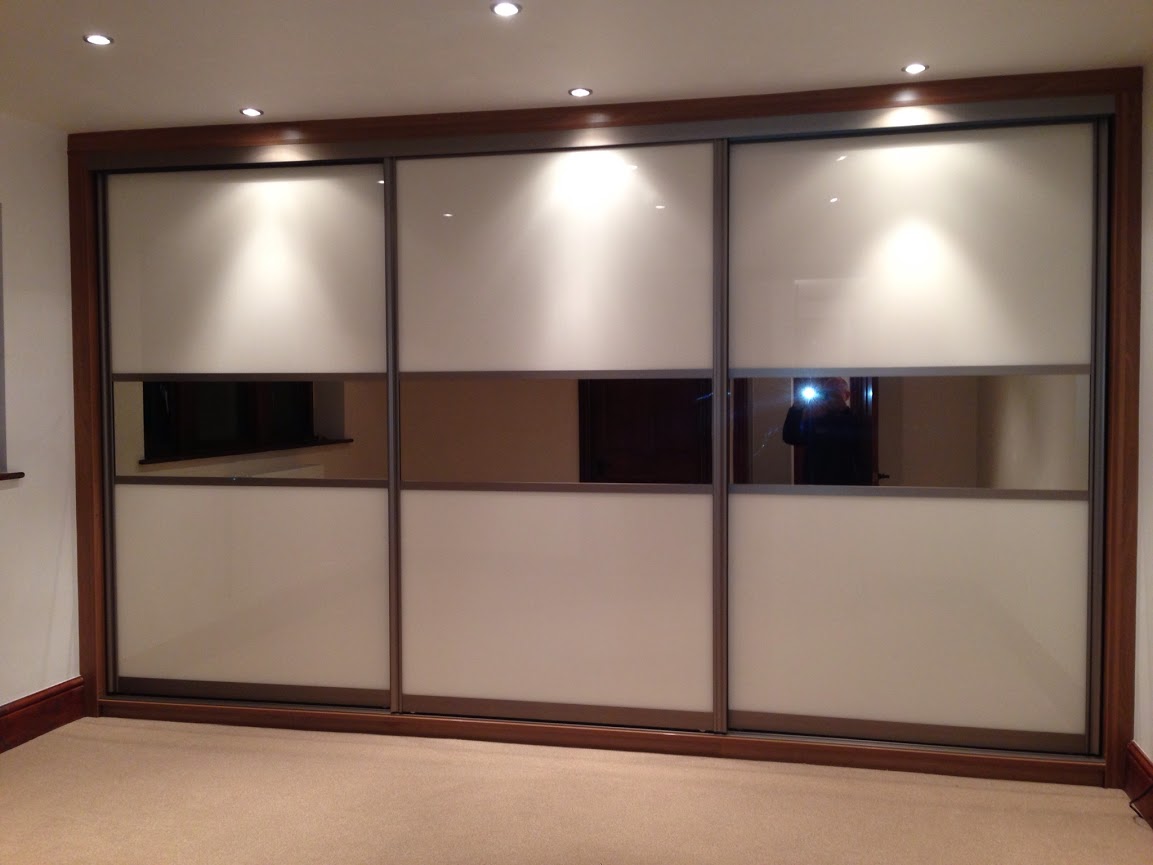
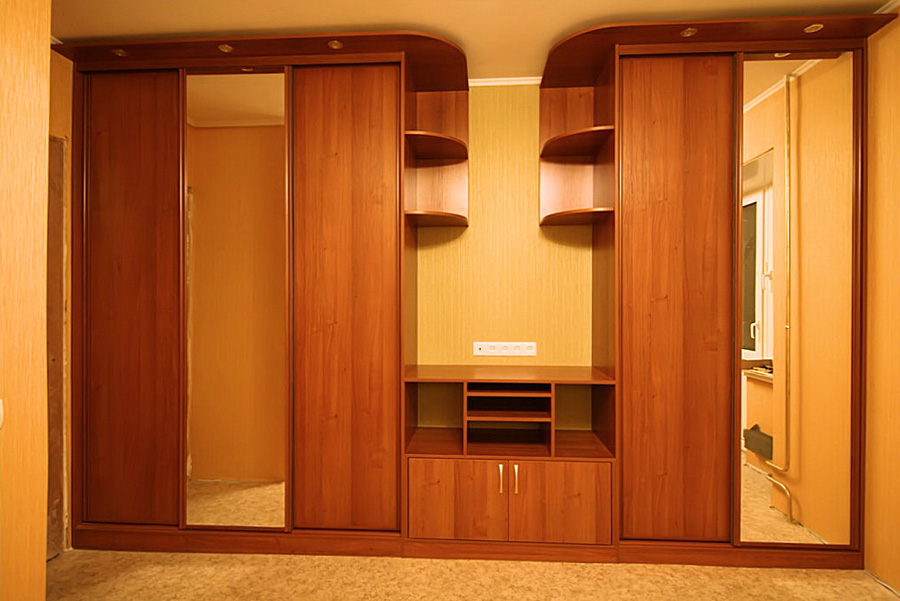
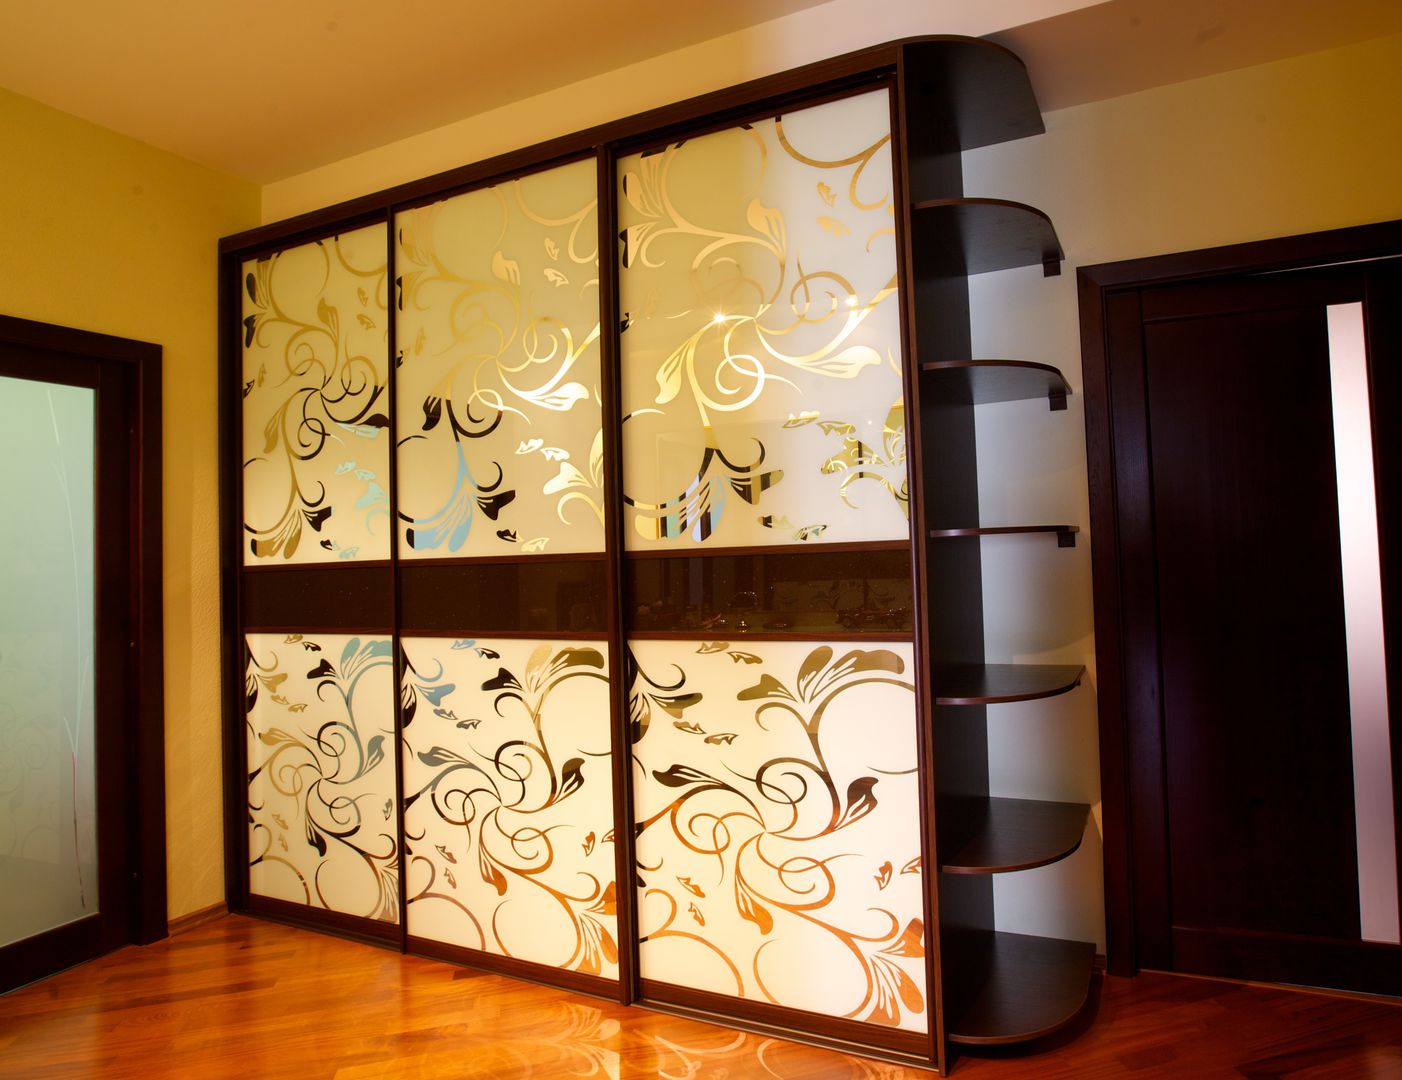
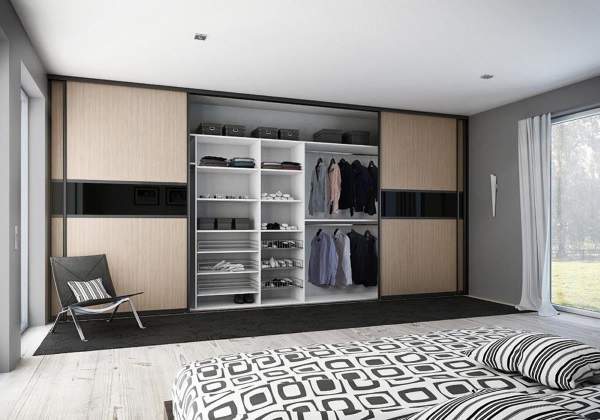
Repair is a long process and it is difficult to keep everything under control. Choosing and buying furniture is a stage that brings you directly to the pleasant result of all the work. But even the calculation of the exact size of the furniture ...
Wardrobe in the bedroom How to assemble a wardrobe
Now designers in interior design more and more often use built-in appliances, pieces of furniture - beds, closets, tables and much more. This approach in the design of the situation allows ...
step by step instructions on how to assemble a wardrobe compartment Instructions for assembling the wardrobe with their own hands.
Each apartment must have such a multifunctional piece of furniture as a wardrobe. He will save space in your home and arrange space. Not everyone can afford to buy it ...
built-in wardrobe mirror Put the "mortgage" for the built-in wardrobe
In the modern interior often have to combine various complex elements. Especially popular is the sharing of the built-in wardrobe and stretch ceiling. But what are the nuances of their installation, in which ...
Wardrobe with bamboo inserts We use wardrobes in the interior as a complete wardrobe
Sliding wardrobes entered the life and interior of the CIS families in the middle of the zero years of the 21st century. It attracts users not only with its modern design, but also with its absolute functionality. No extra ...
Sliding wardrobe in a niche with winter landscapes Measure seven times or How to calculate the closet compartment?
When buying a new home, moving, redevelopment or just when you want to update the design of the apartment, we always think about what kind of furniture to choose so that it is comfortable, beautiful and functional ....
Add a comment
By clicking a button you agree to privacy policy and site rules set forth in user agreement

Sofas

Furniture

Armchairs