 Instructions for assembling the wardrobe with their own hands.
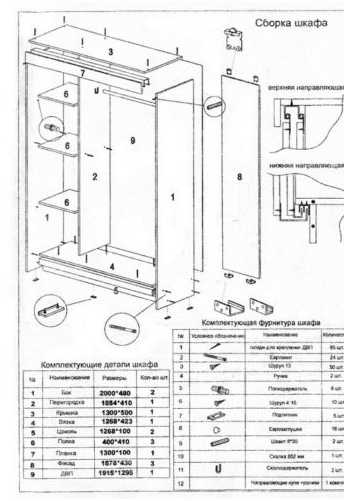
Each apartment must have such a multifunctional piece of furniture as a wardrobe. He will save space in your home and arrange space. Not everyone can afford to buy it ...
Now designers in interior design more and more often use built-in appliances, pieces of furniture - beds, closets, tables and much more. This approach in the design of the situation allows you to save space in small rooms. In modern interiors, built-in wardrobes of various shapes are widely used, they are made from artificial and from natural building materials (wood, plastic).
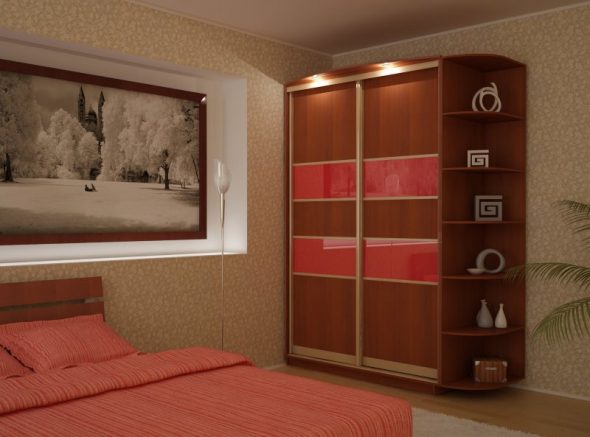
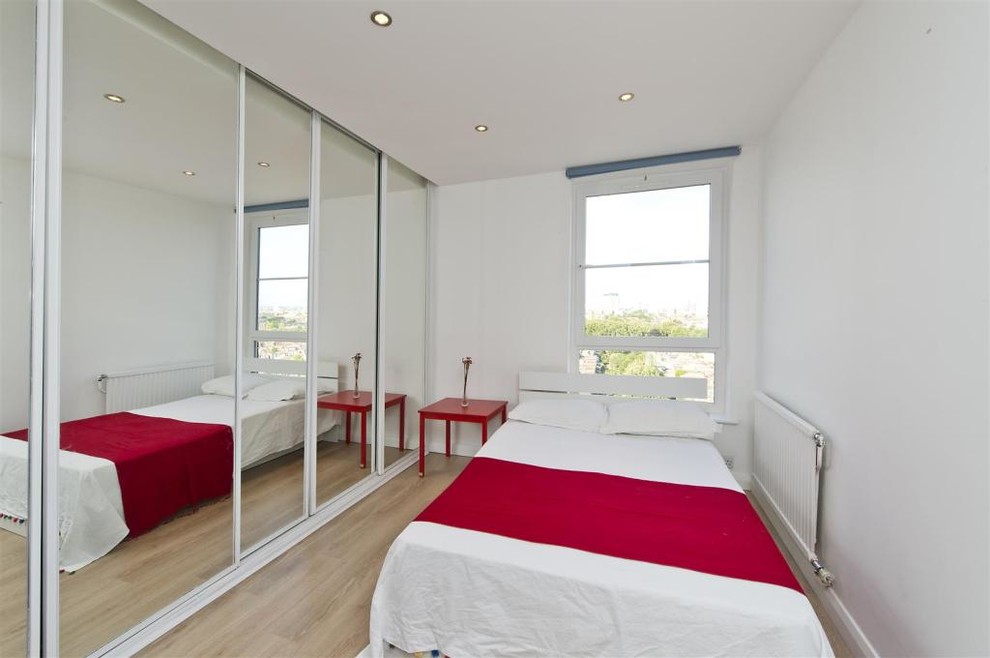
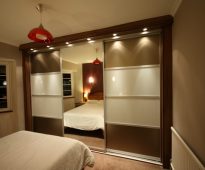
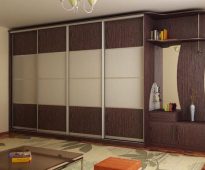
Sliding wardrobes are used in bedrooms, living rooms, hallways
If you make repairs yourself in a house or apartment, you like to make furniture yourself, without the help of experts, it is important to know how to correctly approach the process of assembling interior items. This is especially true of those who make the first steps in this direction. Thus, update the furniture, save a significant amount.
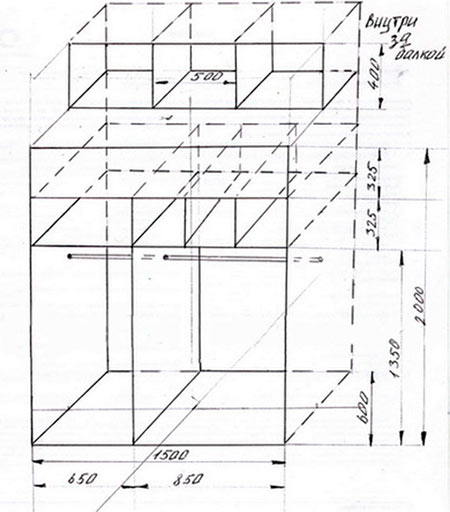
Drawing built-in wardrobe in a niche
Most home craftsmen choose to make and assemble a wardrobe. It occupies a leading position among other types of furniture - universal, capacitive, it can be of various shapes and sizes, it does not need much space to open doors. For these and many other reasons, people choose a wardrobe. Following the step-by-step guide for assembly and installation, it can be mounted in a short time.
Instructions for assembling the closet do-it-yourself
Content
Why is it preferable to assemble the furniture yourself? There are many reasons for this.
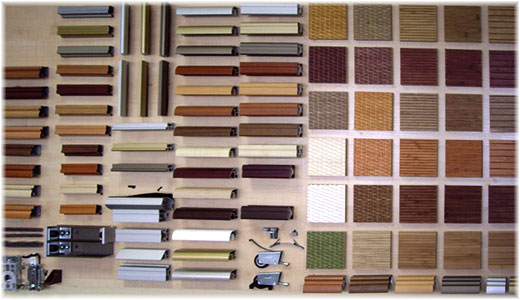
Popular materials for the manufacture of wardrobes
Do not rush to collect a closet with anything, decide on the material.
| Tree | If you choose wood, remember that this material is not suitable for built-in wardrobes, as there is an increased level of humidity in the niches. Wood should not be cracked and knotted. Wood furniture is environmentally friendly, it lacks toxins, it is durable, it looks aesthetic. Such interior items have a natural color and unique pattern.In the future, you can carry out the restoration of damaged areas. |
| Drywall | Of course, this is a suitable material for finishing work, but for the manufacture of the cabinet it is not suitable. Lightweight, but not durable. The design will not look beautiful on the outside, you can not do without putty and final finishing. If you plan to mount the backlight, you need to lay the wires during the construction of the frame |
| MDF, hardboard, chipboard | Quite often used in the manufacture of furniture, in particular, wardrobes. The thickness of the plate should be 0.6-1.2 cm. In addition, PVC film is used, it is easily combined with other materials. MDF - environmentally friendly, therefore suitable for the production of furniture for children |
| Chipboard | A widely used material made from compressed wood shavings. For density use thermoactive synthetic resin. The material is easily processed |
| Fiberboard | It is made from wood waste, paraffin, antiseptics and ceresin are also used. The standard material thickness is 3.2-5 mm. Basically, drawers bottoms and back walls are made of it. |
| Plywood | Different sets are made of it. For cutting material of different thickness using different tools. Do not forget that the material is soft and can be damaged when tightening the screws. Also use laminated plywood |
| Furniture Shield | The most ideal material. It is durable, good, environmentally friendly. It does not require large expenditures, it is possible to carry out any designer's idea, as a result you will have a cabinet of any shape and structure |

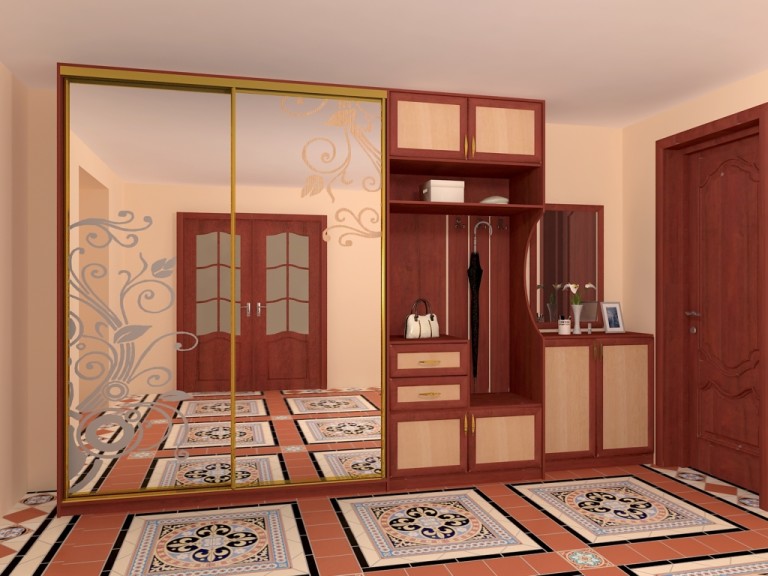
Sliding doors for wardrobes
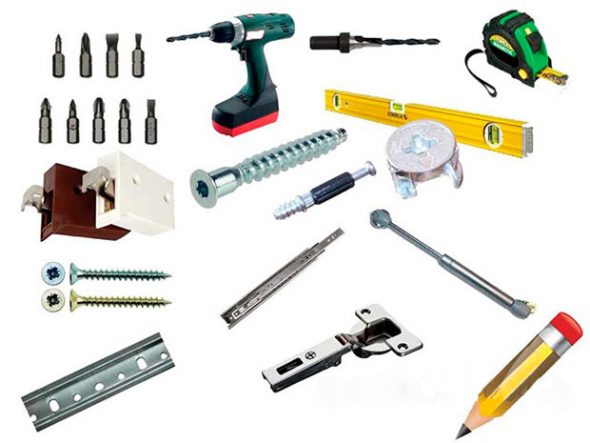
Tools for assembling the closet do-it-yourself
Adhering to the instructions and schemes, the following tools will be needed for the assembly: level (this device will help to assemble the cabinet perfectly smoothly), a corner, a hammer (including a rubber one), a screwdriver with a cross-shaped and straight nozzle, a ruler, a tape measure, a pencil, a screwdriver, drills wood and metal sandpaper.
In addition, you may need and auxiliary tools - a freezer, a drill. Check that the material and accessories comply with the scheme.
Expert Council. Very often in the manufacture of closets with their own hands, doors are made to order. The rollers are already mounted on them, as well as a strip of soft material. Install the door at the end of all work.
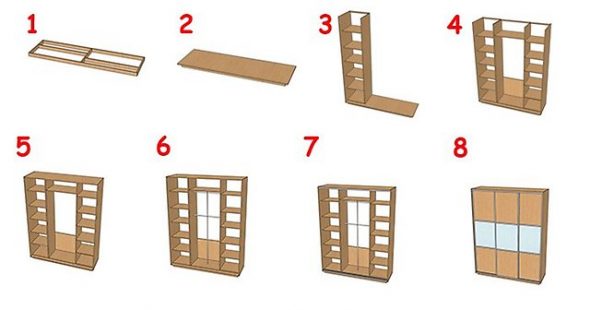
Stages of self-assembly standard wardrobe
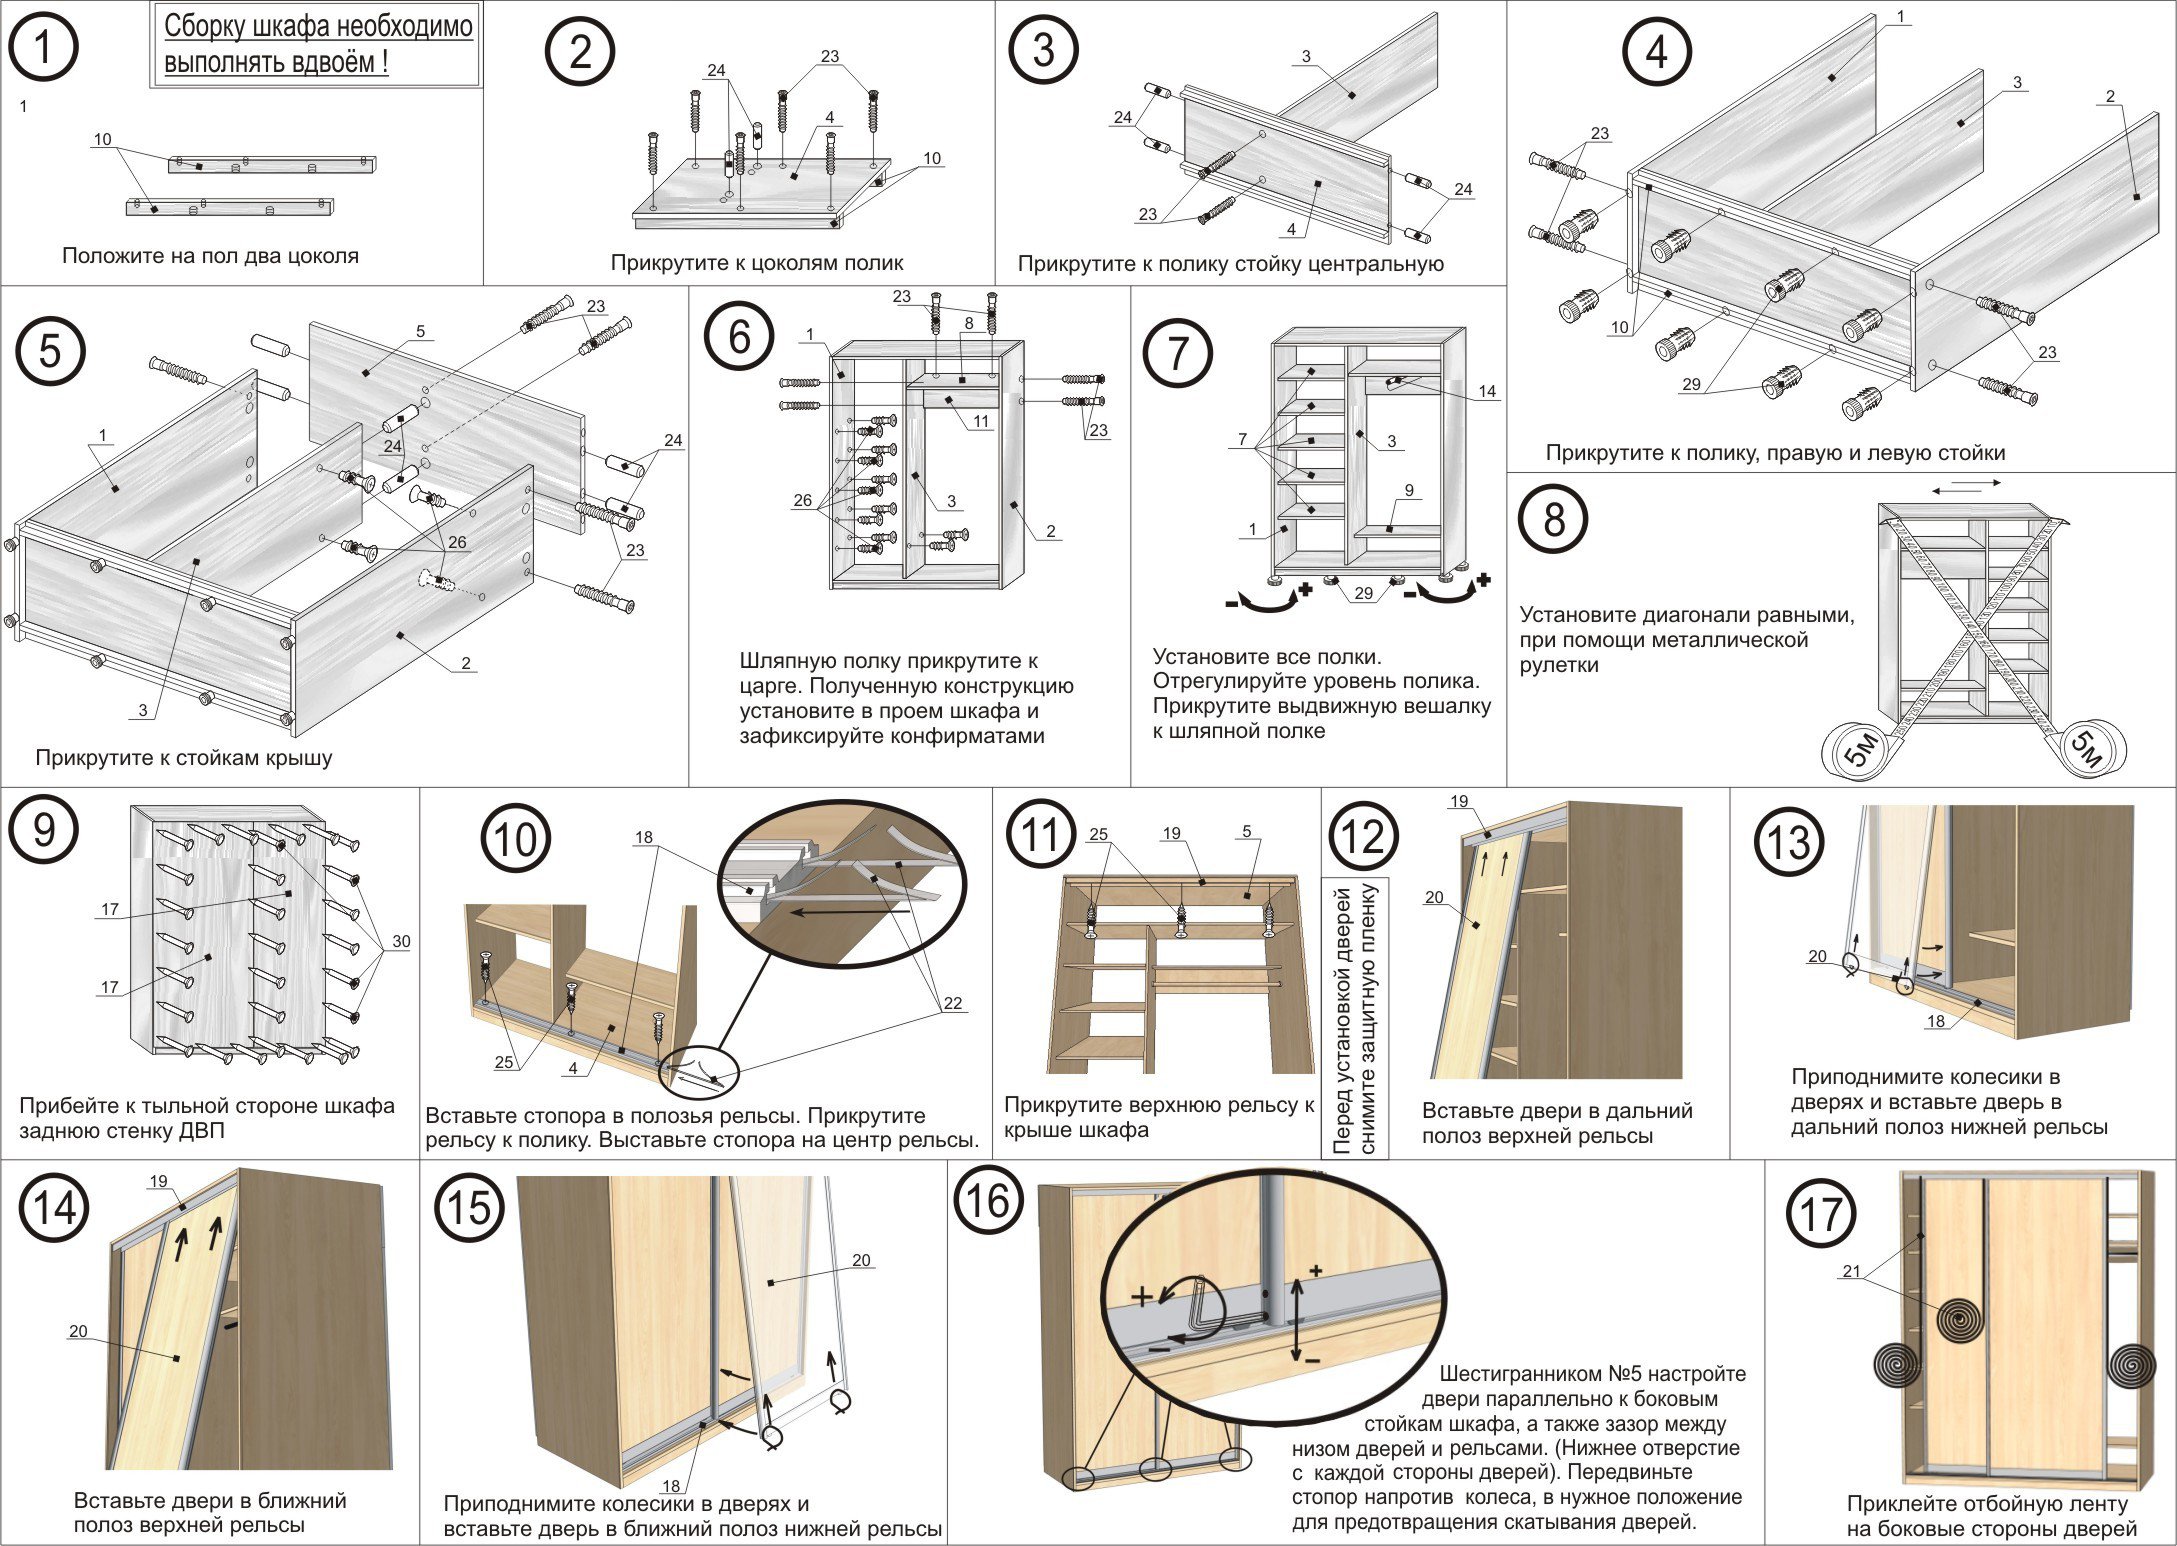
How to assemble a wardrobe. You must first install the base.
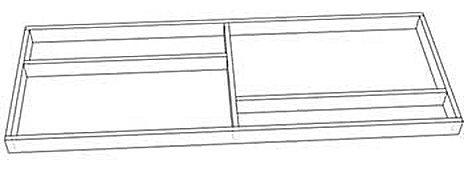
The basis of the wardrobe
Typically, such a plate is attached to the stands, which are located along the long side, with the help of confirmats (these are euroscales, which have a recess in the cap for a special hex key).
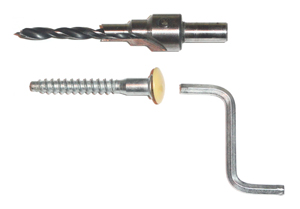
Special drill for confirmatics, confirmatories with plugs and hexagonal key for confirmats
Next you need to arrange the internal partitions. On their bottom face there are holes where it is necessary to mount shkanty before installation. What is shkant? This is a small part of the rod of circular cross section, which serves to secure the wood connections.
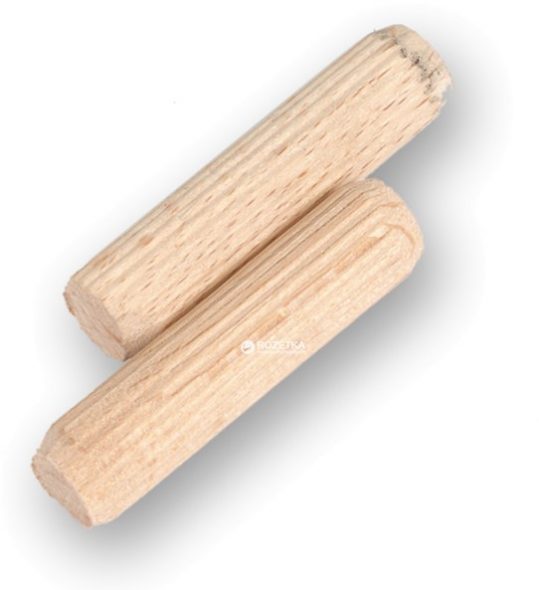
Wooden dowel for furniture assembly
In the bottom plate there are non-through openings, they are provided for such shkanty. Having connected shkanty and apertures, we make installation of vertical partitions in the right place (here not to do without the assistant). To make the construction sustainable, we fix the shelves, which in this case serve as stiffeners. We fix them with confirmats. Fasteners in this step must be tightened completely.
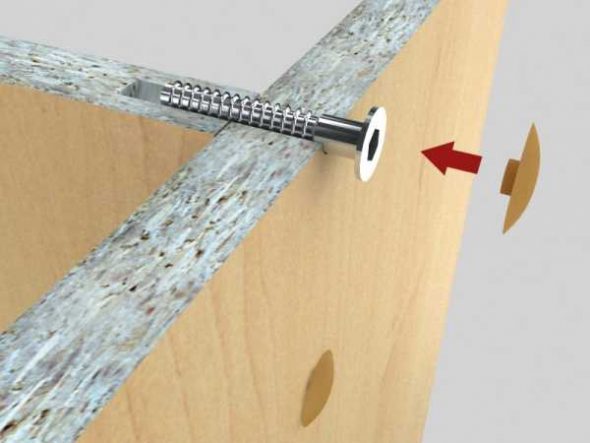
Wall fastening with euro screws
We make the final assembly of the frame - we install the sidewalls and the top cover. All these elements must be installed immediately. Let's say right away, this stage of work is affected by the design features and the location of the fasteners on them.
Installation of the side and inner walls of the cabinet
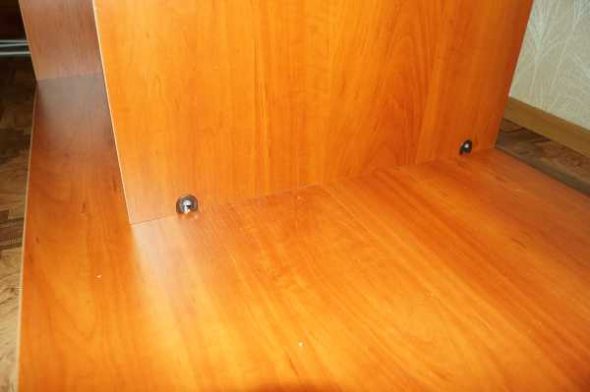
At first we fix it with the base of the sidewall, fastening them to the lower confirmatics. Then we put the top part and, having combined all the holes, fasten with fasteners. Here it is necessary to provide a free course, due to the fact that it is necessary to level the whole base.
The base connects to the hull using corners confirmats
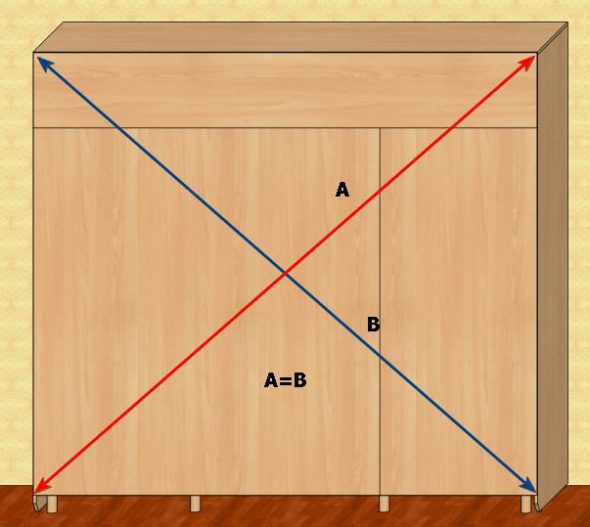
Checking the cabinet diagonals for self-assembly
To perform the alignment, you must perform the following steps. Using a roulette, we measure at first one diagonal, then the other, and from the difference in values we determine where to move the upper part of the cabinet so that its corners are completely straight. Having made alignment in a similar way, we completely twist confirmatics.
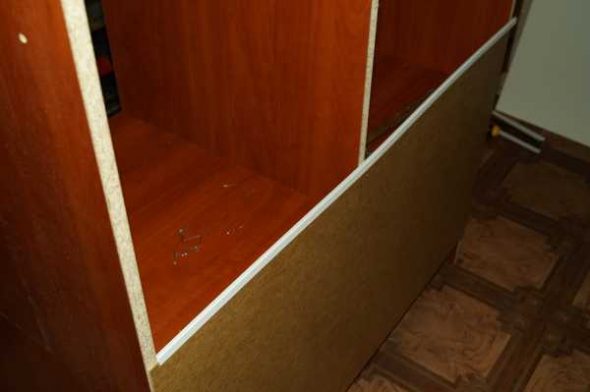
Fastening the rear wall of the wardrobe
The next step of the assembly is nailing the hardboard to the back side of the structure. These sheets will not only form the back wall, but will also securely hold the structure, preventing its loosening during the entire time of use. Usually, the paintings on the right side have a decorative treatment; it looks like a laminated colored surface. Sheets are fixed with the help of small nails, they are hammered into the ends of each piece of furniture.
Here, in principle, it is necessary to determine the place where the nails should be hammered, because on the back side, the furniture elements are not visible, and the defects that result from the wrong choice negatively affect the appearance of the cabinet.
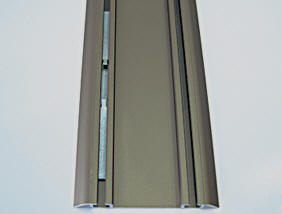
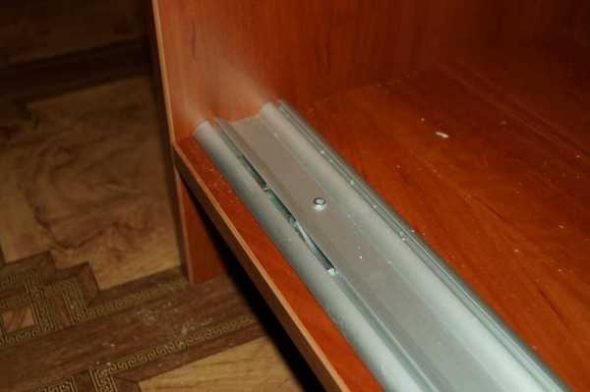
Installing a positioner or stopper in the lower guide of the wardrobe
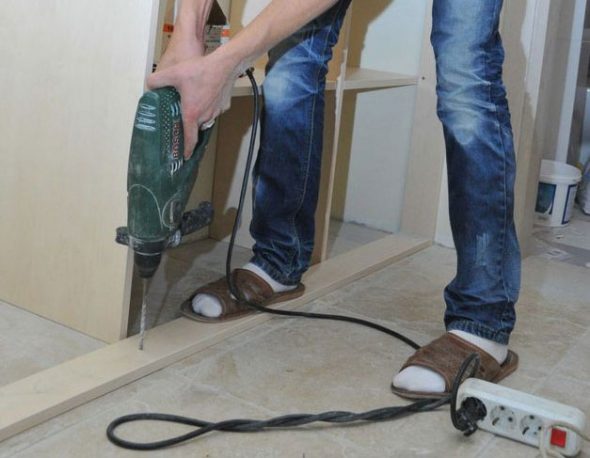
We proceed to the important point - the mounting of rails for doors. The bottom rail has two grooves for sliding the rollers. The top is divided into two sections. In both, you first need to drill the holes, so that using screws to fix them to the base and top, there must be a chamfer at the holes.
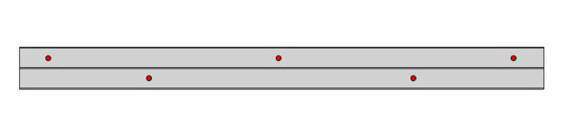
Drilling the top rail for the doors of the closet
Four holes on each plate is enough. First, fix the bottom rail, making the markup in the right places. The interval from the edge of the base to the front edge should be 2.5 cm.
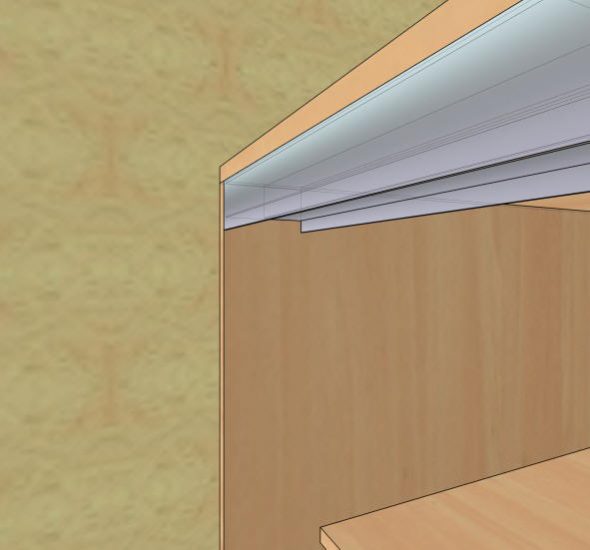
Installing the top rail when assembling the wardrobe
To make the doors move freely, the cabinet should be installed horizontally, using a level for this. It is desirable that he was longer. The top rail is fixed like the bottom rail only with the difference that the holes are drilled in a staggered pattern in all branches. Attach them to the screws. From the front end of the upper part to the beginning of the rail base, the interval should be 2 mm.
The lower guide profile is set indented 15 mm from the edge of the chipboard
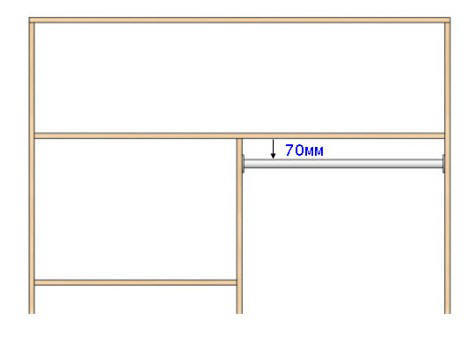
Installation of a bar in a sliding wardrobe
In conclusion, you must install the rod for the location of outerwear. At first, it is necessary to make a markup where the first holder will be fixed (3 screws are necessary for it), we drill and tighten the screws. Then we install the second holder on the rod and press it with a screw. At first it is necessary to try on the resulting structure, if necessary, align it horizontally, and then mark and fix it as the first one.
Installing the boxes when building their own hands
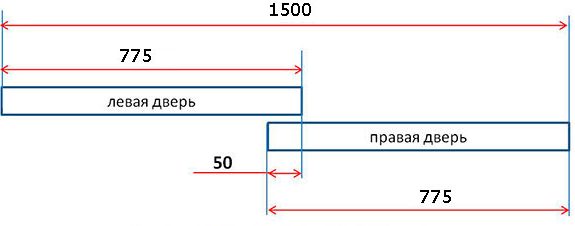
Door Layout (Top View)
After all the work done, you can install the door. But first, you need to check the gutter in the bottom plate for the presence of debris - it will prevent the free movement of rollers. Again we check the horizontal position of the planes, and also that all the connections are well fixed.
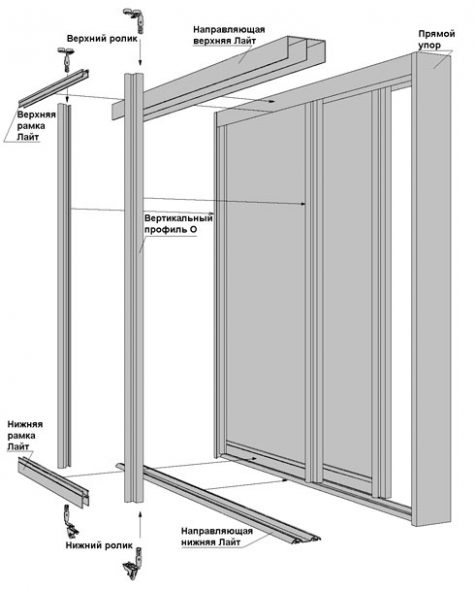
The design of sliding doors closet
Correctly we hang the doors - first of all we insert into the upper rail, then the end rollers must be placed in the lower groove.
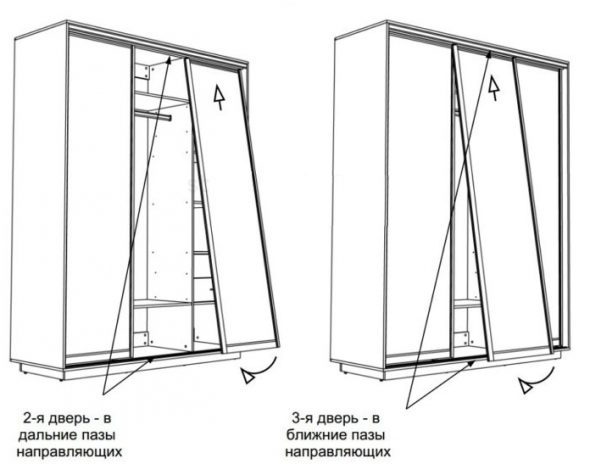
Installation of doors in guides
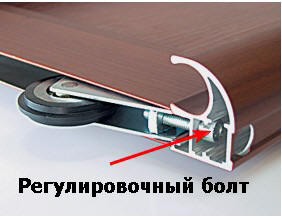
Adjustment of doors when installed in a wardrobe
How to assemble a wardrobe with their own hands.In theory, there is nothing difficult in assembling the closet, there is no need to correctly approach the assembly process, to show patience and accuracy. In the end, you will not only save money, in the house you will have an original piece of furniture that will transform the interior of the room.
Instructions for assembling the wardrobe with their own hands.
 Put the "mortgage" for the built-in wardrobe
 How to create a project wardrobe in the hallway.
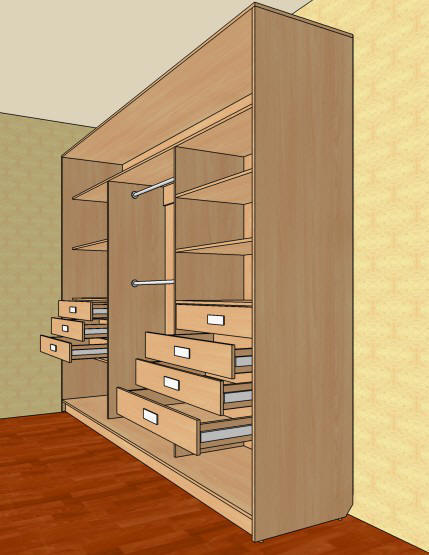
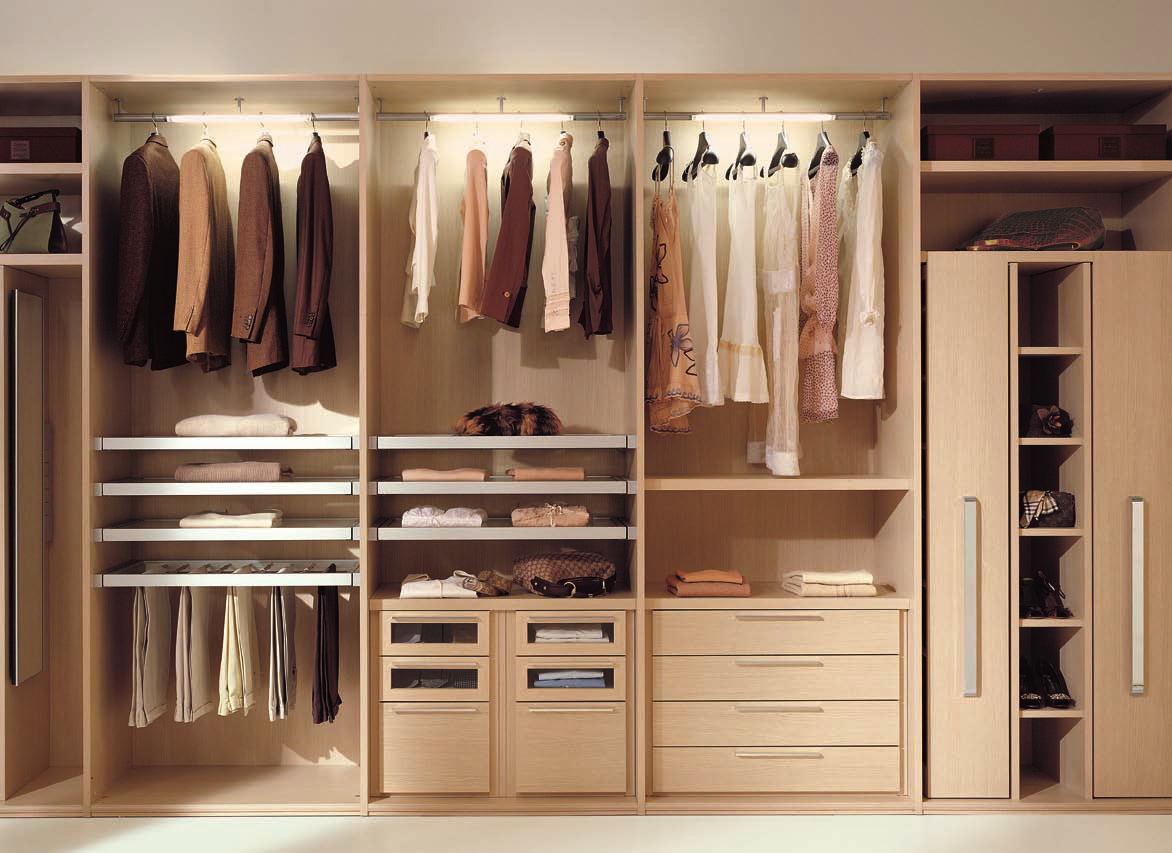 The layout of the internal space of the wardrobe compartment.
 Choosing the wardrobe lighting
 Assembling the closet do-it-yourself: general rules and materials
 To collect the dream apartment


