Simple tips to fix the sink to the tabletop

Kitchen sink must withstand absolutely everything. Hot pots and pans, detergents, ice water and more. Find this very difficult. A stainless steel sink is called eighteen by ten. This is the percentage of chromium and nickel, which is part of the stainless steel. This sink is resistant to corrosion, temperature, household acids and detergents.

Sinks can be mortise or overhead. The first ones crash into the tabletop, the second ones simply overlap the furniture like a cover.

Overhead car wash

Overhead washers are considered the most budget and easy to install.

Mortise countertops

Mortise mounted directly on the countertop, for which you need to cut out the corresponding hole

Tabletop sinks

Under-table sinks are mounted below the table top, thereby providing excellent sealing and appearance

The choice of coverage is small. Either mirror or frosted. Decorated stainless steel differs from smooth thicker, less noisy and greater durability. In general service. Minimum scratches guaranteed if washing meets state standards. It is recommended to check the quality of the purchase with a magnet. High-quality stainless steel does not attract him. Sink made of high-quality alloy will cost no more than five thousand rubles. This is one of the cases when the best price meets the quality.

Metal sink

The metal sink fits most interiors, is simple and reliable in operation, easy to clean.

Sink from porcelain tile will cost about twelve thousand rubles. But the quality of porcelain is always on the level. The shape, size, smoothness of the bends - all this does not give a fundamental role for the functioning of the sink. It's a matter of taste. It was revealed that for convenience, the wash should be at least 25 centimeters in length. A depth of not less than fifteen centimeters. When choosing a sink, you need to carefully examine it. Enamel should be flat and smooth. There should be no protrusions and depressions. It should have two holes for the mixer and drain.

Porcelain stoneware sink

The porcelain stoneware shell is durable and durable, environmentally safe, presented in a variety of colors and configurations, but more expensive

Table top drawing

Drawing layout countertops for installing mortise washing

Tools for installing the sink in the countertop:

  • pencil and ruler. for marking holes in the cabinet;
  • drill;
  • Jigsaw or jigsaw. for cutting holes under the sink.
  • set of screwdrivers;
  • pliers;
  • silicone sealant;
  • rubber compressor.
Mounting methods

Ways of installation of a sink in the tabletop

Mounting mortise sink in the countertop

Mounting sink mortise in the countertop

Mounting sink mounting scheme

Before you install the mortise sink, you need to determine the place where it will stand. To start the installation, we measure four centimeters from the far edge of the tabletop and six centimeters from the near edge of the tabletop. We take a pencil and celebrate.

Cardboard blank

We use cardboard blank to put the most accurate contour on the base of the tabletop

To accurately cut the gap for the bowl, attach the sink back side and use it as a stencil. Circle, turns into an oval or a circle.We clean the bowl, circle again with more fatty trace. Make another contour a centimeter deeper. On this trail and cut. We make a hole for a jigsaw in any convenient place, without going beyond the contour. Cut the circle. To get a smooth cut, use a file with a straight tooth. That the cut oval did not fail, we fix it from below with usual self-tapping screws.

We cut a niche for washing

We cut a niche from the front of the tabletop using jigsaw

On special brackets install crab, which will be, clings to the sink countertop. Before installation we put siphon and tap under the table top. So much more convenient. At the crane immediately fasten the hoses. For reliability, you can screw a couple more screws and continue. After finishing oval cutting, it can be dismantled. For this you need to hold it well. Install the sink in its place. After installation, we coat the end of the cut with sealants.

Apply a layer of sealant

Apply a layer of sealant on the edge of the table top (cut), which will protect the wooden surface from moisture penetration and prevent the wood from swelling

We use seal

You can use the seal as a method of sealing

In the future, if moisture gets under the sink, the tabletop will not swell. Connect the tap. Siphon and use.

Fixing sink with clips

You can use special mounts to secure the sink to the table top.

Mounting the sink in the countertop step by step

Laid on sink

Surface wash is designed for mounting on standard thumbs of standard width.

  • Install countertops, or open the old. The box remains without the top cover, fasten it from the bottom and top.

    We collect the cabinet

    We assemble the underside walls with screws or wooden dowels

  • We cut off the top cover in size and make a gap for future washing in the worktop.
  • We make strips that will stand at the top of the cabinet.

    Washing mounts

    Washings are g-shaped plates with a slit oblique on one of their sides.

  • We coat with sealant to prevent water from flowing under the edges. We install slats on the missed edges on both sides.

    Apply a layer of sealant

    Apply a layer of silicone sealant on the upper end of the walls of the undervoltage

  • Then we make the installation of invoice sink. To do this, screw in the middle of the slot screws.
  • Put the sink on the cabinet.

    Mount the mixer

    Mount the mixer and siphon on the sink

  • We put the corners on the screws, latch them. The difference between the surface mounted device and the mortise is that the waybill does not need to be screwed. It is enough to put, firmly press and lock the locks to the tabletop.
Mount the sink

Carefully install the sink, so as not to damage the installed siphon and mixer and do not touch the applied sealant

Checking the work done

We connect the mixer and siphon to the pipes and check the work done

Mounting the stone sink in the countertop

We cut the sink into the countertop

The sink inset in the countertop

Stone sinks are eighty percent stone and twenty percent binder materials. Stone shells withstand heavy loads, do not conduct electricity, are not exposed to aggressive substances, are safe for products. We measure the dimensions of the sink in the tabletop using a ruler and a pencil. We take the sink, turn it over, we circle it.

We lead around the sink with a pencil

We lead around the sink with a pencil and, retreating inwards by 1.5-2 cm (depending on the size of the side of the sink), draw a cutting line

Measure out the exact dimensions. Drill a hole. Take a jigsaw, set in the drilled hole, cut out a circle. We put the sink, it should just go to the sawed place.

Take out the inside

When everything is sawed through, you can simply remove the inside of the tabletop.

Coat the edges with silicone, using a construction gun. Apply a thick layer of silicone around. In sawing with a rag or glove we smear silicone. We also apply sealant to the sink. After that, install it in the cabinet.

Insert the sink into the hole

Carefully turn over the sink and insert it into the hole, trying not to touch the sealant applied to the edges

The hole for the mixer should be closer to the wall.We put in it any load to press it well. Leave for twelve - 20 hours. Remove excess silicone. We connect the mixer and siphon.

We install siphon on a sink

We install a siphon and a mixer to the sink and connect the siphon to the sewer pipe

Mounting integrated sink in countertop

Integrated kitchen sink

The integrated kitchen sink creates a single composition with the kitchen worktop and requires skills in working with tools, so the expensive option is best left to professionals.

Such equipment is one with the table top and sink. To him make higher demands. These devices are thicker than usual, and have a longer service life. Just as for the installation of the previous types of washing we make a hole in the cabinet, clearly measuring the dimensions. You can order templates to install any washes. So, we make the markup of the future hole, cut it. Sharp edges are removed by a mill. Then the roundings are polished manually. Put polymeric glue. After drawing set the sink. It is fixed and left for 12 hours. In conclusion, the shell is additionally fixed, filling it from the bottom with a rapidly hardening resin. It is important that the casting mass is applied only to the side walls. Then make waterproofing with adhesive tape or aluminum tape. Remove excess glue after hardening casting mass. Connect the water and drain.

Installation of siphon and sink mixer

Installation of the mixer and siphon for washing

The scheme of assembly of a sink with a siphon in sewer release

Siphons have two main parts: the main, small. They are collected among themselves. A plastic nut is inserted into the small one. The rubber seal is inserted under the nut. A small part is inserted into a large one. The nut is screwed in all the way. But even if you tighten the nut, most will move a little. It is necessary for us to position the corrugation in a comfortable position. In the tube that is on the bulk. Next to the one in which we screwed a small part. Insert the rubber seal into the second nut. Screw the second part of the siphon into this tube, which will be attached to the bottom of the sink and countertop. Screw the nut all the way down so that the rubber gasket is well pressed. Screw the lid rev siphon. In case of clogging, you can unscrew this cover to clean the clog and screw the cover back. It is easier to install the siphon before installing the sink, and not vice versa. Screw the screw into the siphon to the characteristic squeak. There is no need to twist. It remains to build corrugation. To do this, first insert the nut, seal, insert into the siphon, screw in until it stops. Now you can connect to the sewer from the countertop.

It is important to choose the right countertop mixer. First, you need to decide how you want to turn on the water. Turn the crane or raise and lower the lever. Everyone can choose for themselves a suitable design. It is worth remembering that low price and fashionable design is a sign of poor-quality production. It is better to buy a simple European tap. When buying it, you should take into account the quality of water and the presence of a gas column in the house. Mixer prices range from lowest to highest. It all depends on the quality. So, we start the installation. Shut off the hot and cold water taps. Screw flax threaded connections. We put on flax sanitary paste. After that, screw in the sockets.

Silicone sealant can be used. This is done to protect flax from rotting. We attach flexible hoses to the mixer. There are two of them. Put a ring gasket on the base of the mixer. It must be in its intended groove, otherwise the water will flow. Twist the threaded pins. In the complete set of the mixer there can be one or two. Pass the flexible hoses through the sink mounting hole. At the same time it is necessary to check whether the ring gasket has not moved. Fix the mixer bottom. We put on the rubber seal. Using the spanner wrench, firmly tighten the nuts over the seal.The crane should not move. We connect a flexible hose to supply water to the outlets. It is important that the hoses are not twisted and bent during installation. After all these actions, we check the work of the new equipment. Open the water and check for leaks.

Video: Installation and replacement of the mixer, sink

We recommend related articles.
Placing the dishes in the corner cabinet Everything is at hand: the correct filling for kitchen cabinets
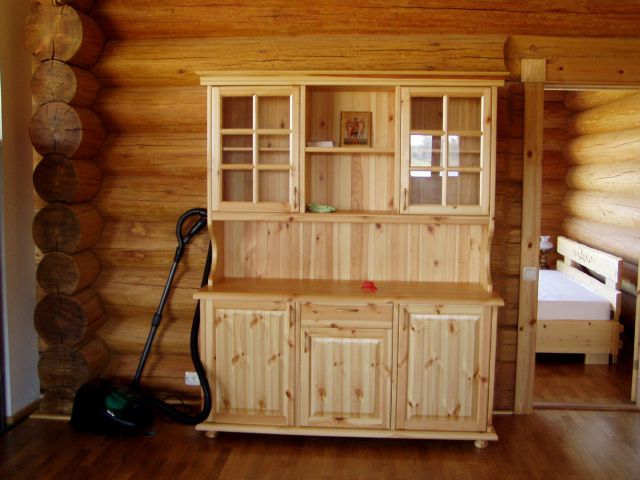
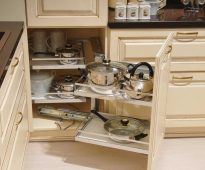
Every hostess wants order in the kitchen to reign, so that during the preparation of food everything you need is on hand. The kitchen is not just a room, however small, a different household appliances are placed here ...
Wooden sideboard How to make a DIY do-it-yourself buffet
Wood is a wonderful material for making furniture: durable, aesthetic and durable. Products made from it are elegant and practical, and if they are hand made, then ...
Replacing the facade before and after How to change the fronts on the kitchen set with your own hands?
The kitchen is not only the working room of the hostess, but also a place to gather the whole family. Therefore, this room should not only be comfortable and functional, but also bring beauty, coziness and comfort to others ....
Folding chairs and a folding table for a small kitchen Choosing kitchen tables and chairs for a small kitchen
The kitchen is a must-have attribute of any apartment or house, they cook food in it, eat food, often meet guests in the same room, and every evening they gather as a family for an evening tea party ....
Marble chipboard top Postforming countertops - what is it and how to use?
Choose a worktop or kitchen set? Do not know what to prefer among a large number of goods. We offer to pay attention to the postforming countertops. What is it, how does it work, how is it right ...
concrete worktop How to make a countertop for the kitchen with their own hands
Table top is the main attribute of any kitchen. She takes the brunt of any kitchen manipulation. But if the surface of the kitchen countertops became uneven and covered with indelible ...
Add a comment
By clicking a button you agree to privacy policy and site rules set forth in user agreement

Sofas

Furniture

Armchairs