10 simple steps to assemble a chest of drawers with your own hands

Practicality and convenience of a dresser proved by time, no wonder this piece of furniture does not lose its relevance over the centuries. Surely you will also appreciate all the functional benefits as soon as it appears in your home. Socks, shawls, bedding will find their permanent place. However, it is quite possible to arrange a chest of drawers in the hallway, and it will become a repository of umbrellas, gloves, and cosmetics.

dressers in the interior

With the acquisition of the chest will immediately disappear problems with the storage of small things.

The advantages of the chest of drawers collected independently

Not always, the architectural features of the room and existing items in the interior, allow you to purchase a chest of drawers in the store. Indeed, very often, the standard dimensions of the product are absolutely not suitable for placement in an apartment. In this case, an alternative option would be to make it at home. By doing chest of drawers, you get the opportunity to develop your own design, choose the optimal size, color palette and structure of the material.

dresser in the bedroom

A chest of drawers made with your own hands can be organically incorporated into the overall concept of the existing style.

In addition, it will be possible to save a considerable part of the money. You will be able to spend the amount you ask for buying a similar dresser at a point of sale for better fittings (handles, guides) or for more important acquisitions.

chest of drawers yellow

Many do not even know how useful items are chests.

About, how to make a chest of drawers with your own hands will be discussed in today's article. Indeed, despite the seeming simplicity, this business has its own nuances, which should be read in advance, so that the final result will delight you for many years, and not cause you to be irritated.

red chest of drawers

The chest is lighter and more elegant. Unlike the cabinet, it does not look bulky.

Choose design and material for manufacturing

If you doubt your artistic taste and design abilities, then in search of ideas for creating a chest of drawers with your own hands, you can reconsider the catalogs of well-known furniture manufacturers. Surely among the many samples, it will be possible to find a suitable option that will need only be slightly adapted to individual requests.

TV cabinet

The beauty of the dresser is that it, like the console table, can be turned into one of the decorative centers of the room.

The standard sizes of a dresser have the following dimensions:

  • ATheight 800 mm;
  • ShIrina 800 - 1200 mm;
  • RLubin - from 300 mm.

Higher models of the dresser are recommended to be fixed to the wall of the room, so that when opening loaded boxes it does not accidentally tip over.

high chest of drawers

The chest can be decorated with decor, including a very active and catchy.

In too wide chest of drawers, be sure to provide for strengthening the bottom of the drawer. Also keep in mind that at high loads during the operation of the boxes, the sliding system can deform and jam.

classic dresser

The top of the chest of drawers is decorated with table lamps, clocks, candles, figurines, vases, plants, boxes, photographs, souvenirs.

Dressers from a natural tree continue to be favorites. And modern decorating materials make it possible not only to paint them, but also to decorate them using decoupage technique or artistic painting.

dresser decor

These types of decor can be easily made under the stencil.

Undoubtedly, wood remains the best material for the manufacture of furniture, but in recent years laminated chipboard has enjoyed no less popularity, the advantages of which include:

  • Hhigh cost
  • Mscarlet weight
  • Shiroky color palette
  • Lease of assembly,
  • ABOUTthe absence of the need for final decoration.
three-door dresser

Today, the dresser in the interior is simply irreplaceable.

Sometimes, for the manufacture of facades of drawers instead of laminated chipboard, chipboard is used, and the finished product is decorated with MDF overlays. Such a chest of drawers looks much more expensive and more presentable.The massive top cover will add a chest of solidity. When the budget is limited, it can be made of 2 layers of 16 mm LDSP, twisting them together, and glue the cuts with a wide edgeband.

chest of drawers in the hallway

When designing the dresser, pay attention to its future placement in the room.

After all, often the floor plinth makes it difficult to put the furniture butt against the wall. There are several possible options:

  1. Installing the chest on the legs, which can later be closed with decorative strips.
  2. Mounting the table top, which will protrude from behind.
  3. He drank at the bottom of the dresser.
chest of drawers

If you do not have a similar object in use, then after a closer acquaintance with his qualities, you will certainly go to acquire it.

Detailing and cutting

If you know how to use computer programs for furniture design, then your task is much easier. Otherwise, you can resort to the following options:

  • Take advantage of ready-made drawings and reveal them as close as possible to your requests.
  • To make a drawing and calculate the dimensions of each part manually, using a pencil, a ruler and graph paper.
  • To master the computer program Compass 3D or AutoCAD.
drawing chest

In drawing up the drawing, note that the thickness of LDSM is not only 16 mm.

There are options 10, 16, 18, 20 mm.The distance from the side walls of the dresser to the side walls of the drawer is 12.5 mm on each side to accommodate the guides.

chest of drawers

The back wall of the dresser should be at a distance of at least 15 mm from the outer edge of the drawer, in order to avoid deformations.

Be sure to consider the edge. If its thickness is 1 mm, then this distance must be subtracted from all sides of the parts.Calculating the size of the facades, remember not only about the edge, but also about the gap between the boxes. From the height of the facade, you must subtract 5 mm (edge ​​thickness above and below + 3 mm gap).

chest of drawers

As an example, we offer a detailing of a dresser made of a sheet with a thickness of 16 mm and 0.5 mm covered with a melamine tape.

For the manufacture of the bottom of the drawers and the wall of the chest used fiberboard

Table 1

Name of parts Sizes mm Quantity, pcs
1 Table top dresser 800x500 1
2 Side stand 816x475 2
3 Bottom (bottom) 800x475 1
4 Facade 797x205 4
5 Coupling rail 768x80 2
6 Side of the box 160x450 8
7 Drawer front 160x709 4
8 The back wall of the box 160x709 4
9 Rear wall of the chest 828x795 1
10 Bottom of the box 738x447 4

Required materials and tools

Consider in detail how to make a chest of drawers with your own hands from LDSM.

In the process of work will need:

  • Shurupovert;
  • Drel;
  • TOunzelarsky knife;
  • Havegolnik;
  • Rflying or meter;
  • TOarandash;
  • WITHtriple hair dryer or iron;
  • WITHVerla 4.5 mm and 8 mm;
  • BIt is under confirmat.
  • Least chipboard;
  • WITHAmoreza;
  • HGuides (sold in sets of 2 pcs. Right guide and left guide);
  • TOonfirmate 5x70 or 5x50 mm;
  • TOromka for processing the ends;
  • Ruchka for boxes;
  • Ddouble sided tape;
  • Rstand up
instruments

Tools and materials.

Step Assembly

  1. Despite the fact that the processing of chipboard is not difficult, to dissolve the sheet at home without a sawing machine, you are unlikely to succeed.Of course, you can use an electric jigsaw, but in this case, be prepared for small chips with the cut (parts of the coating break off and form an inaccurate edge). It is much better to use the services of professionals who quickly and accurately cut the necessary details to you.

    cutting parts

    If this is not possible, then leave 1 - 2 mm of stock on all sides of each part, and then grind off the excess, so it will be possible to minimize chips.

  2. ATTreat all open ends with an edge, on the basis of which a layer of glue is applied, melting under the action of high temperatures. Apply tape to the part, align and iron with a regular iron without steam or a building dryer. Take your time, warm up the edge in small areas, and then carefully press, wiping with a soft cloth. Cut off the excess edge with a stationery knife or blade from a planer, keeping it at a 45 degree angle to the part.

    edge processing

    Sand the joints with fine sandpaper.

  3. Mark spaces for confirmats, drill holes. Despite the fact that the diameter of the confirmat is 5 mm, it is still better to use the drill 4.5. Difficulties when screwing will not arise, because the material is quite soft and malleable.

    corroboration drilling

    Thus, the quality of the compounds will increase significantly.

  4. Before you begin to assemble the body of the dresser, mark the axes for fixing the guides. Usually begin marking from the bottom, retreating 30 mm from the inner surface of the bottom, hold the first axis. Subsequent lines are calculated based on the height of the front of the box, adding 3 mm to this value to the gap and taking 25 mm. The resulting mark will become the center of fastening of the guide bar. If the sizes of all the boxes are the same in height, then the distances between the axes will be symmetrical.

    installation of guides

    Perform a similar procedure on the two side walls, making sure that they are mirrored.

  5. Connect the details of the hull, affirming with each other. It is more convenient to start the assembly from the bottom, securing the side racks to it, and only then the tie bars on top. Before you nail the back wall, be sure to check not only all the corners, which must be straight, but also diagonal.

    confirmatics assembly

    If there are errors, they are necessarily eliminated, and only then the back wall of the dresser is installed.

  6. If the design includes legs, screw them.

    thrust bearings on the bottom

    In our case, special thrust bearings are used.

  7. Install the top cover by attaching it to the inside of the dresser.

    cover installation

    For reliability, we use ready-made furniture corners.

  8. Assemble the side walls of the drawers in a single design. Check the conformity of the diagonals and the correct angles, and then boldly fasten the bottom.

    box assembly

    The boxes are located in parallel, they should be as smooth and equal as possible.

  9. Insert the drawers into the dresser. It's time to fix the facades, for this use double-sided tape. First, fix all the front parts on the adhesive tape and only then remove the drawers and screw the facades on the screws.

    almost ready dresser

    To make an even 3 mm gap, start gluing at the bottom, placing between them 3 mm pads.

  10. The final chord will be the installation of handles on the boxes.

    ready dresser

    If all the calculations in the detailing were performed correctly, and the parts were cut without errors, then during the assembly there will be no difficulties.

Assembled chest of drawers for sure will delight you and your family for many years.

VIDEO: Dresser with his own hands.

Chests in a modern interior - 50 photo ideas:

We recommend related articles.
light chest Build a dresser with your own hands - nothing complicated!
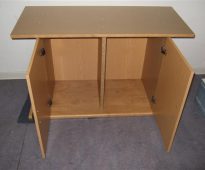
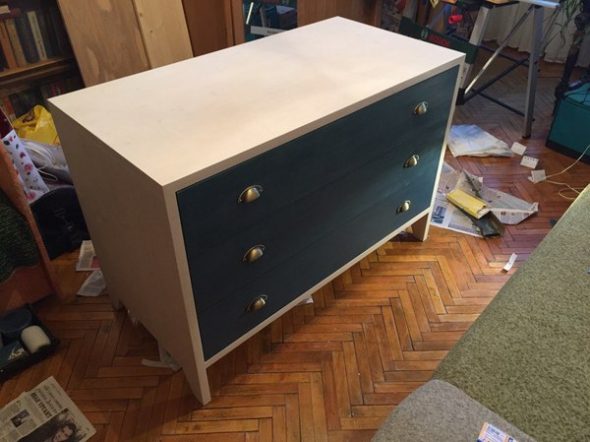
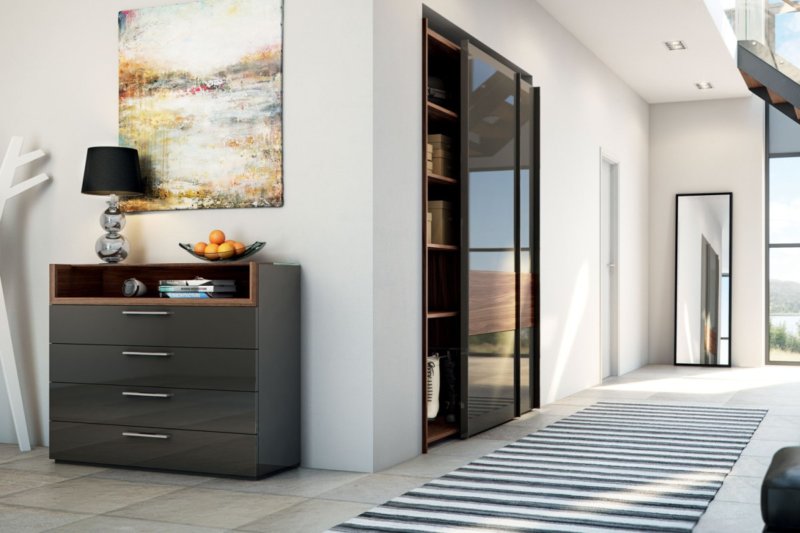
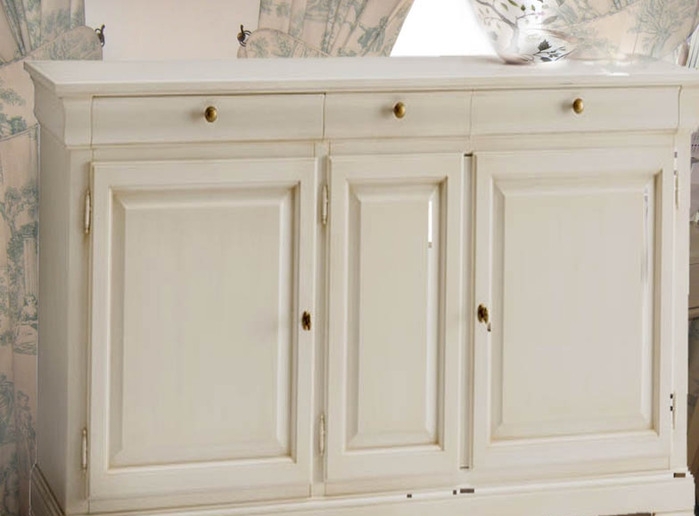
Bought a new dresser? Wonderful! Remained correctly assemble it. If for some reason it is not possible to use the services of a professional furniture assembler, there is only one way out - self-assembly. The total ...
Homemade pedestal stand Mastering aquarium cabinet with your own hands
The aquarium allows everyone to arrange a corner in their home for relaxation. The beauty of underwater life is fascinating and soothing.That is why people are happy to acquire aquarium fish and organize ...
TV stand from plywood do it yourself How to make a TV stand with your own hands
Televisions are becoming smaller. Models TVs make it easy to mount them on the walls, on special brackets. Despite all the new-fashioned interior solutions, the TV stand does not lose its ...
make a cabinet under the sink with your own hands from scrap materials How to make a cabinet under the sink with your hands quickly and easily?
A stylish, modern bathroom cannot be imagined without a pedestal under a washbasin that hides communications, extends the functionality, ennobles the interior. Many people buy this item, ...
white-green bathroom cabinet Bathroom cabinet sink - a beautiful solution for a beautiful bath
Curbstone under the sink - a comfortable, functional piece of furniture for the bathroom. This is an additional storage place for bath accessories, household items, cleaning products or linen. The facade of the pedestal is excellent ...
nightstand How to make a bedside table with your own hands.
Interestingly, the cabinet with their own hands - not just a cheap version of furniture. This is a stylish addition to the interior space. Create a cabinet can almost everyone. But the original is already difficult to do. Determined ...
Add a comment
By clicking a button you agree to privacy policy and site rules set forth in user agreement

Sofas

Furniture

Armchairs