How to make a stand holder for books with your own hands?

Books, in any form, will always be in fashion, as well as bookshelves for them. But made with their own hands, stands for books, can diversify even the most dull interior.

A modern book holder can be of any shape.

Often he reflects the interests of the owner of the house, his fascination with some theme or genre, adherence to a certain style.

The main purpose of this uncomplicated device is to preserve good vision in children, since a vertically positioned book does not strain the pupil, preventing changes in the structure of the lens of the eye. Also, modern design solutions are focused on minimalism and comfort, and a stand for books in this case is indispensable, because it makes room at the desk.

The shape of the book holder depends only on the fantasy and interests of the owner.

This is not only a convenient device, but also a great interior detail.

In order for a graceful accessory to decorate a home, just a few hours of free time, fantasy (and the World Wide Web will help you to draw interesting ideas), patience and perseverance. A book holder can be made without special material costs, because you can use as a material: toothbrushes, cardboard boxes or wooden planks, children's toys, plaster or plywood, and even wallpaper that has remained after repair.

Even the most unnecessary things will help to turn an amazing idea into life.

Wooden stand

The classic material for creating a stand is a tree. At the same time, it is possible to use both wooden planks, a wooden block, a log. In this case, an irreplaceable auxiliary tool will be sandpaper or a sander, which eliminate flaws in the wood and give it an aesthetic look.

Such a stand can be made of boards or plywood.

You can also make a stand for books made of wood with your own hands, “breathing new life” into the old kitchen board. It is enough to attach a book holder to the front and a retaining bar at the back. You can decorate the material with decorative paint of one or several tones (for example, according to the type of the popular ombre). The finished product must be thoroughly dried.

It is suitable for reading books, as well as for tablets and other electronic devices.

Important! In carpentry work, haste is not welcome, so think carefully about what the finished product will look like. It would be nice to make a layout and carry out all the necessary measurements, and only then proceed to the processing of parts.

It is very convenient to use the stand in the kitchen for a book of recipes.

It is excellent to replace wood in the manufacture of a stand for books can plywood. For this you need:

  1. cut a sheet of plywood into 5 parts: 20x1x2 cm. - 2 pcs .; 18x3x2 cm. - 1 pc .; 20x5x2 cm. - 1 pc .; 34.5x20x2 cm. - 1 pc .;
  2. further in the largest plate cut the grooves for the legs;
  3. in the place of the cut grooves glue the front details of the workpiece in the center;
  4. put the press on the glued parts and dry it;
  5. then the legs should be glued and also dried under a press.

If desired, you can decorate the stand by cutting or burning wood, paint it with paint, open it with varnish.

Additional Information. Details can be dried in turn, if there is no special vice. To do this, you can use any weighting agent.

Cardboard stand

If you are wondering how to make a paper book holder, use cardboard.

Corrugated cardboard can be made and such a stand.

  1. Cut 2 identical rectangles, each 35 × 42 cm in size. Bend them 14 cm from the long side and glue into one piece.
  2. Cut another 2 rectangles measuring 5x14 cm and also glue them together.
  3. Glue the small and large triangles together as follows: glue one end to the smaller part of the folded rectangle at the edge, and the second approximately to the middle of the large part. Grease the joints thoroughly with hot melt.
  4. Cut the part 29.5 × 10 cm and fold it in half.
  5. Cut a rectangle in width 2 times smaller than the previous one. The parts from clause 4 and clause 5 are glued together to form a triangular cylinder.
  6. To glue the cylinder to the big preparation from below.
  7. Prepare to glue newspapers and napkins, paint and varnish.

Very light, compact. It can also be made from plywood.

Ironwork

From iron you can forge a true work of art. But how to make a stand for books of iron, if you are not a blacksmith? - using wire. The flexibility of the material can give it any desired shape. For a book accessory, you will need a wire with a diameter of 4-5 mm, 4 pins with a diameter of 1.5 mm.

Elegant interior emphasis for books is easy to make, you only need to have imagination and some skills to create handicrafts.

For such creativity will be useful all sorts of, but at the same time affordable household items.

Gypsum stand

No less attractive for designers are hand-made book holders. For the embodiment of the most intricate ideas you can use gypsum.

Book holders in the form of plaster hands will fit into a different interior.

Prepare a mixture of gypsum and water.

Important! In this case, an assistant is needed, since it is best to keep the form horizontally and not vertically.

This magnificent designer thing can be made from plaster, for example, by capturing your hand, foot or any object. First of all, it is necessary to stir the alginate to a pasty state. As a form, you can use a regular box sealed with adhesive tape.

To find out the amount of the required mixture - pour water into the glove.

In the box, make a hole for the hand and first pour out part of the alginate to the level of the hand, and in a minute the remaining mass. After about ten minutes, the hand is simply pulled out. Fill the hole with plaster. Leave to dry overnight. After cutting out the alginate and reaching for the plaster arm. To paint and glue to a wooden plank. Instead of a hand, you can use any other shapes, for example, like an elephant in a photo.

Plaster stand for books in the form of an elephant.

Additional Information. The remaining small lumps and bubbles in the alginate liquid do not affect the result.

From other materials

Also, the holder for books can be made with stone by yourself. In the simplest case, you will need two massive stones, paint in cans, cork adhesive pads so that the stones do not scratch the surface and move easily. Stones need to be painted, for example with fashionable golden or silver color. Cork pads should be glued to dried stones.

Stone supports for books make it even easier: just find a suitable cobblestone on the street, cover it with paint and varnish.

The holder, made in a similar way, can take on any appearance depending on the fantasy of the author.

For the manufacture of the holder for books of concrete on the shelf with their own hands, first of all, it is necessary to lubricate the oil form.Next, knead the concrete to a pasty state. Forms pour concrete and leave overnight to dry. To seize the grasped parts from forms, having knocked on them a brick or the hammer. Grind the bottom of the future stand. At the end of the form to paint or leave as is.

After the paint has dried - the fly-leaves are finally ready to hold the books.

Additional information: to get rid of bubbles, you need to knock on the tank with concrete and shake it.

Minimalistic, reliable design of the holder of the branches of a tree. Well complete a number of publications on the shelf.

Antique owls look massive and thorough.

If the classic options are boring, then the answer to the question of how to make a creative book holder with your own hands will help:

  • Handset old wired phones;
  • Kids toys;
  • Pillows of different shapes.

In the nursery such a soft pillow stand is the place.

You can also cut a toy animal, such as a giraffe, horizontally. To paste a back part to the left holder, and front - to the right.

The ingenious dachshund holder is another find for extraordinary natures or a gift option.

Successes in creative searches!

Soft and textured turned out to be animal-holders of books covered with sheep wool.

VIDEO: How to make a stand for books with their own hands.

50 original book holders:

We recommend related articles.
crib sides Sides in a bed for newborns with their own hands. Patterns and Tips
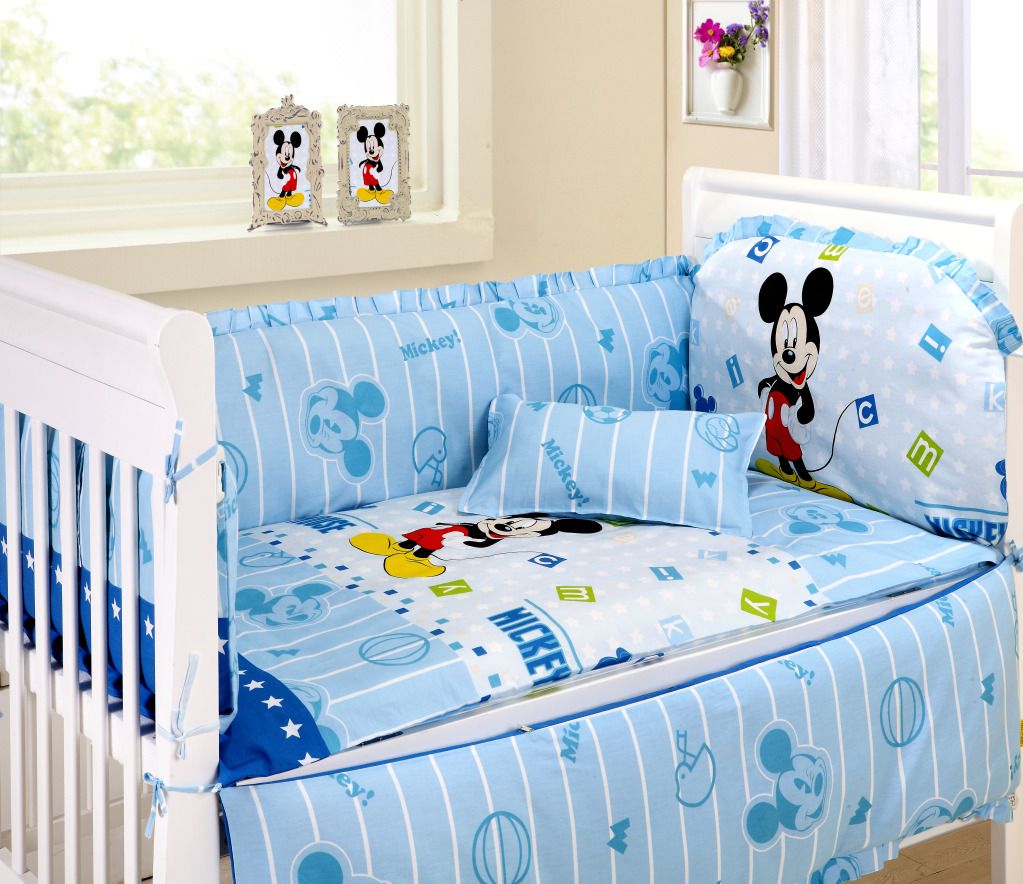
The side for a children's bed is very practical and necessary thing. This element makes it possible not only to protect the baby from the cool draft, but also to weaken its contact with the hard rods ...
How to make origami from paper napkins do it yourself?
Origami (from Japanese "folded paper") is a kind of ancient decorative and applied art of the Japanese. It consists in the addition of various figures of napkins or paper. Few people know that this art form ...
roller box mechanism Roller guides for drawers. How are they arranged?
The mechanism of roller guides is a pair of so-called rails, between which several (2 or more) small wheels are installed. The latter provide the movement of both parts ...
We make a floor hanger in the apartment for clothes with their own hands
Corridor - an important part of any apartment or house. This is the place through which the guests pass, and the hanger is one of the main components of the hallway. Just like without a sofa, it's hard to imagine a living room, not ...
computer chair black How to drag a computer chair with their own hands.
Computer chairs - a very common piece of furniture. The service life of the chair depends on its quality and the materials from which it is made. Woven materials can tear when careless ...
What to do if the cat did not go to the tray, and on the sofa How to get rid of cat urine smell on the couch
Probably, all pet owners faced “emergency” trips to the toilet by the cat and did not know how to get rid of the smell of cat urine on the couch, having tried all possible means. Is it possible to...
Add a comment
By clicking a button you agree to privacy policy and site rules set forth in user agreement

Sofas

Furniture

Armchairs