Doing decoupage wardrobe

Breathe new life into the old wardrobe with your own hands, and you can create furniture that will seamlessly fit into the interior using decoupage decorating technique.

upgrade old cabinet

Breathe new life into the old wardrobe with your own hands, and you can create furniture that will seamlessly fit into the interior using decoupage decorating technique.

The principle of decoupage is gluing paper drawings to any household items to create a certain style. Decoupage refers to the type of work, called upsikling - the decoration of old things, creating new quality items from them.

Decoupage with craquelure effect

It is most convenient to use napkins - softness, subtlety of paper allow you to accurately make a beautiful ornament on the furniture, creating invisible transitions from the common surface.

Now there are a lot of offers to buy new furniture, but do not rush to throw out the old, convenient wardrobe - it is possible to transform it with the help of decoupage even to those who have never done or not repaired furniture with their own hands. Picking up materials and turning on the imagination, you can do the decoupage of the cabinet with your own hands in any style - classical, Provence, country, modern.

Old wardrobe decoupage photo

To soften the transition between the plane of the main canvas and the picture will help applying several layers of varnish.

Ideas for decoupage

In addition to special drawings for decoupage, you can transform a wardrobe using any available paper tools:

  • napkins;
  • color pictures from magazines;
  • wallpaper;
  • colorful prints.
plastic decoupage furniture

Remove all elements from the frame: handles, doors, unscrew hinges, pull out drawers and, preferably, remove the facades from them - they are carefully processed separately.

It is most convenient to use napkins - softness, subtlety of paper allow you to accurately make a beautiful ornament on the furniture, creating invisible transitions from the common surface. Napkins, sold in regular stores, are suitable for creating wardrobe decor in any style - you just need to choose a suitable ornament. Large selection is provided to create a Provence style - cozy, romantic, sophisticated images of flowers, plants, executed in pastel colors on a light background, will create comfort, fill with tranquility.

decoupage on furniture photo

A large sandpaper or abrasive mesh wipe the islands, previously treated with paraffin.

Thicker textures are first thinned with sandpaper. To soften the transition between the plane of the main canvas and the picture will help applying several layers of varnish.

decoupage on furniture

To soften the transition between the plane of the main canvas and the picture will help applying several layers of varnish.

Wallpapers are suitable for those who are just beginning to master the decoupage technique of furniture. You can make a unique decor with them, using several different types on the same plane or having decorated the projections of the facades.


cabinet before and after

The most difficult thing to prepare for a decoupage is a polished cabinet - the paint on the polish falls badly, so it must be thoroughly cleaned with a large emery cloth.

Decoupage of the old cabinet is not limited only to paper materials, you can use beads, sequins, other decorating objects.

we cover with the second paint coat

It breaks off, and it is not cut off so that the transitions between the pattern and the plane of the cabinet are invisible.

Training

Preparing a closet for decoupage is the most time-consuming process, accompanied by dust.

Decoupage furniture decor

Moving from the center of the napkin, using a brush, gently straighten the paper, pressing lightly, avoiding wrinkling and wrinkling.

To work required


  • Abrasive grids: significant surface irregularities are treated with coarse-grained, then medium texture, fine polished under the finish.
  • Grater for fixing the grid.
  • Dry cloth, sponge or brush.
  • Putty wood.
  • The spatula is rubber - it is soft and covers up all the pits, cracks.
  • Roller.
  • Primer - acrylic can be used for all types of finishes.
  • Respirator.
  • Acrylic paint.
  • Roller.
  • Narrow tassel.
DIY furniture remodeling

Periodically it is necessary to moisten the drawing with diluted PVA glue.

Furniture preparation

Remove all elements from the frame: handles, doors, unscrew hinges, pull out drawers and, preferably, remove the facades from them - they are carefully processed separately.

decoupage furniture do it yourself master class

If painting of art elements on furniture or adding any volumetric decorations is envisaged, this should be done after the glue has dried.

Brush off the old coating (a rag clogs the dust into cracks), put on a respirator and sand the surface of all parts. After each treatment, remove dust.

Reverse decoupage mirror cabinet front

You can not only admire the closet, but also fully use it.

Degrease with acetone or white spirit.


Putty: wipe large flaws, remove unevenness, then level the surface with a thin layer, treat with abrasive mesh No. 100-120, for painting No. 180 and above.

Decoupage furniture with napkins

Do-it-yourself work on decoupage furniture is painstaking, but the result will be a pleasure from it.

Apply a primer - improves adhesion of the surface with adhesive and coloring materials, contributes to a uniform color tone.

decoupage do-it-yourself headset

Before gluing the wallpaper, it is necessary to separate the seamy layer of paper, then they will become thinner and less varnish layers will be required.

After complete drying of the primer with acrylic paint, paint over the corners with a brush, large planes with a roller.

Decoupage cabinet to

Pictures are cut, smoothing the transition to the surface of parts is provided in the case of their application with several layers of varnish.

To create the look of antique furniture after the first layer of acrylic paint, fluff a few spots on the surface of the cabinet with a paraffin candle. Then again primed the cabinet. A large sandpaper or abrasive mesh wipe the islands, previously treated with paraffin.

Old cabinet in a new way

. If a napkin is used as a decor for decoupage, then carefully cut the paper around the pattern.

The most difficult thing to prepare for a decoupage is a polished cabinet - the paint on the polish falls badly, so it must be thoroughly cleaned with a large emery cloth.

Decoupage cabinet doors

The most difficult thing to prepare for a decoupage is a polished cabinet - the paint on the polish falls badly, so it must be thoroughly cleaned with a large emery cloth.

Decoupage process

To fix the drawings you will need the following materials and tools:

  • PVA glue;
  • water;
  • two paint brushes - one thin for painting, one wider for gluing;
  • napkins;
  • acrylic lacquer;
  • acrylic white paint;
  • colors for paint.
Wooden cabinet must be sanded

After complete drying of the primer with acrylic paint, paint over the corners with a brush, large planes with a roller.

Apply PVA glue, slightly diluted with water, to the prepared cabinet with a paintbrush at the location of the pictures. If a napkin is used as a decor for decoupage, then carefully cut the paper around the pattern. It breaks off, and it is not cut off so that the transitions between the pattern and the plane of the cabinet are invisible. Pictures are cut, smoothing the transition to the surface of parts is provided in the case of their application with several layers of varnish.

principles of decoupage

Learning to do decoupage wardrobe

Moving from the center of the napkin, using a brush, gently straighten the paper, pressing lightly, avoiding wrinkling and wrinkling.Periodically it is necessary to moisten the drawing with diluted PVA glue.

cabinet remodeling (decoupage)

Preparing a closet for decoupage is the most time-consuming process, accompanied by dust.

Before gluing the wallpaper, it is necessary to separate the seamy layer of paper, then they will become thinner and less varnish layers will be required.

decoupage furniture from chipboard do it yourself

Decoupage old cabinet is not limited to paper materials, you can use beads.

To avoid the rupture of the pattern during decoupage, the usual clerical file will help:

  • put a napkin over it;
  • spread pva with glue;
  • attach to the cabinet surface;
  • iron with a cloth or sponge;
  • remove the file.
Decoupage cabinet

Wallpapers are suitable for those who are just beginning to master the decoupage technique of furniture.

Apply acrylic lacquer on a napkin with at least 2 layers, the wallpaper is covered with 3 layers, the effect of “aging” of the cabinet can be made using craquelure varnish.

General principles of decoupage

We learn to perform decoupage cabinet with their own hands.

If painting of art elements on furniture or adding any volumetric decorations is envisaged, this should be done after the glue has dried.

decoupage old cabinet

The principle of decoupage is gluing paper drawings to any household items to create a certain style.

Dense pictures can be pasted in the way of “embedding”

  • cover the cabinet with 2 layers of lacquer at intervals during the drying period;
  • apply varnish for the 3rd time, attach a picture;
  • rubber spatula, easily pressing, push the paper into the surface;
  • After drying, coat with varnish.
Napkins for decoupage

Picking up materials and turning on the imagination, you can do the decoupage of the cabinet with your own hands in any style - classical, Provence, country, modern.

Do-it-yourself work on decoupage furniture is painstaking, but the result will be a pleasure from it. You can not only admire the closet, but also fully use it.

VIDEO: The decor of the old cabinet, master class

50 photo ideas how to make decoupage cabinet do it yourself

We recommend related articles.
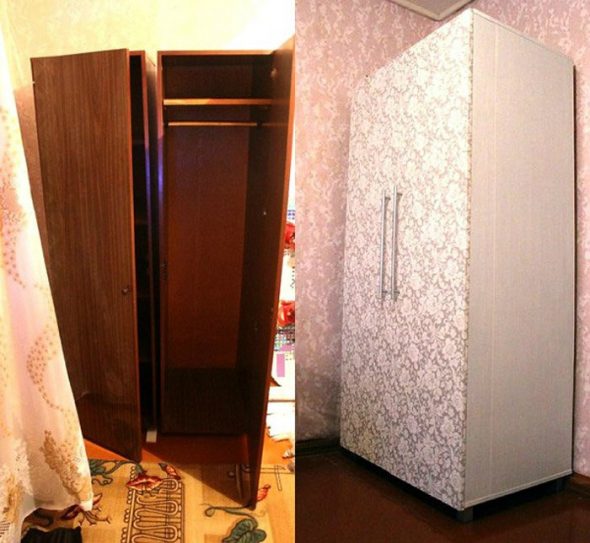
We make a floor hanger in the apartment for clothes with their own hands
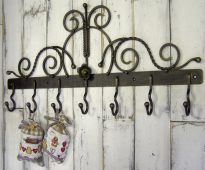
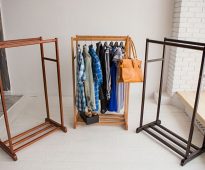
Corridor - an important part of any apartment or house. This is the place through which the guests pass, and the hanger is one of the main components of the hallway. Just like without a sofa, it's hard to imagine a living room, not ...
What should be a home apartment fountain?
Fountains, waterfalls and other natural sources of water attract attention and create positive emotions. Such a design can be purchased in specialized stores or do it yourself. Device...
gradient color combination of walls The combination of colors of the floor and ceiling in the interior. Table and photo
Working on the color design of the interior, it is necessary to solve several problems at once. It is necessary to take into account the influence of color on the mood of the inhabitants of the home, the psychological perception of shades of color, the influence ...
Types of forged hangers for the hallway with design options
The hallway is the first thing that a person sees when entering the house. When its design is often faced with a lack of free space. It is not always possible to fit here a wardrobe or separate shelves for ...
How to make a crochet box with your own hands?
Crochet technique allows you to make various things and crafts, including a complex configuration. Colored thread can tie a jar, a square box, a bottle of a fancy shape, ...
crib sides Sides in a bed for newborns with their own hands. Patterns and Tips
The side for a children's bed is very practical and necessary thing. This element makes it possible not only to protect the baby from the cool draft, but also to weaken its contact with the hard rods ...
Add a comment
By clicking a button you agree to privacy policy and site rules set forth in user agreement

Sofas

Furniture

Armchairs